
Malted Chocolate Cake with Peanut Praline
Another birthday cake

I don’t know if it was the recent drop in temperature, but I have started craving mince pies like nothing else. It’s also not just mince pies, actually lots of Christmas foods. It is like my body knows! To fulfil the craving, I *could* have baked a batch, but, truth be told, my fiancé hates them, and there is no point in my making them when I’m the only one to enjoy them. No, I’ll wait until we have people over to make a batch. Instead, I decided to check my lists of previous favourites. London has so many excellent bakeries, and many of them make incredible mince pies, and thankfully, we must be on the same culinary wavelength because a few of them have already started making them this year.
My all-time favourite pie comes from Esters, a coffee shop in Stoke Newington, around the corner from my old flat. They’re absolutely incredible, and I still get at least one each year. As they’re not making them yet, I opted for a visit to Quince Bakery, another north London favourite, and it was absolutely delicious. If you need another festive treat, Anna at Quince is also making Christmas pudding fudge this year. If you’ve never had the chance to try her ridiculously good sourdough fudge, you know how good this fudge will be!
For some reason, I’ve also had a lot of requests for my list of favourite London bakeries recently (is everyone coming to London this winter?) and whilst I don’t currently have a big master list published anywhere, a major oversight, my friend Jennifer (of The Next Delicious Thing) does have a very handy selection of maps to help you cut through the noise. Jennifer has been working in the food industry for an incredibly long time and has been running food tours, specifically chocolate tours, for 20 of those years. She visits more bakeries, more chocolate shops and more ice cream parlours than anyone else I know. To say she’s plugged into the London sweet scene would be a huge disservice to the amount of time she spends visiting purveyors of delicious things. Over the last year, she has curated three maps that cover over 300 locations across the city, covering the topics ‘Bread’, ‘Cakes and Cookies’ and ‘Croissants’. The maps have been updated every month of this year, so they are incredibly up-to-date. Jennifer has also given me a discount code to share with you, just use EDD2025 and you can get the maps for just £11
I love making other people’s birthday cakes. I hate making wedding cakes. I know that could sound a little counterintuitive, but think about the pressure. Making someone a wedding cake is (hopefully) a once-in-a-lifetime thing, the biggest day of their lives! That’s a lot of pressure on one cake. I’ve made many wedding cakes in my life, but I generally have a strict rule: I’ll only make a cake for someone who I care enough about, which means I would happily take on that stress, and that’s a small circle of people. Birthday cakes, however, I love making them. Instead of a stressful lead-in, I find birthday cakes are a lot more fun. I like to try and tailor the style and flavour of the cake to the person, which means each and every birthday cake I make tends to be unique.
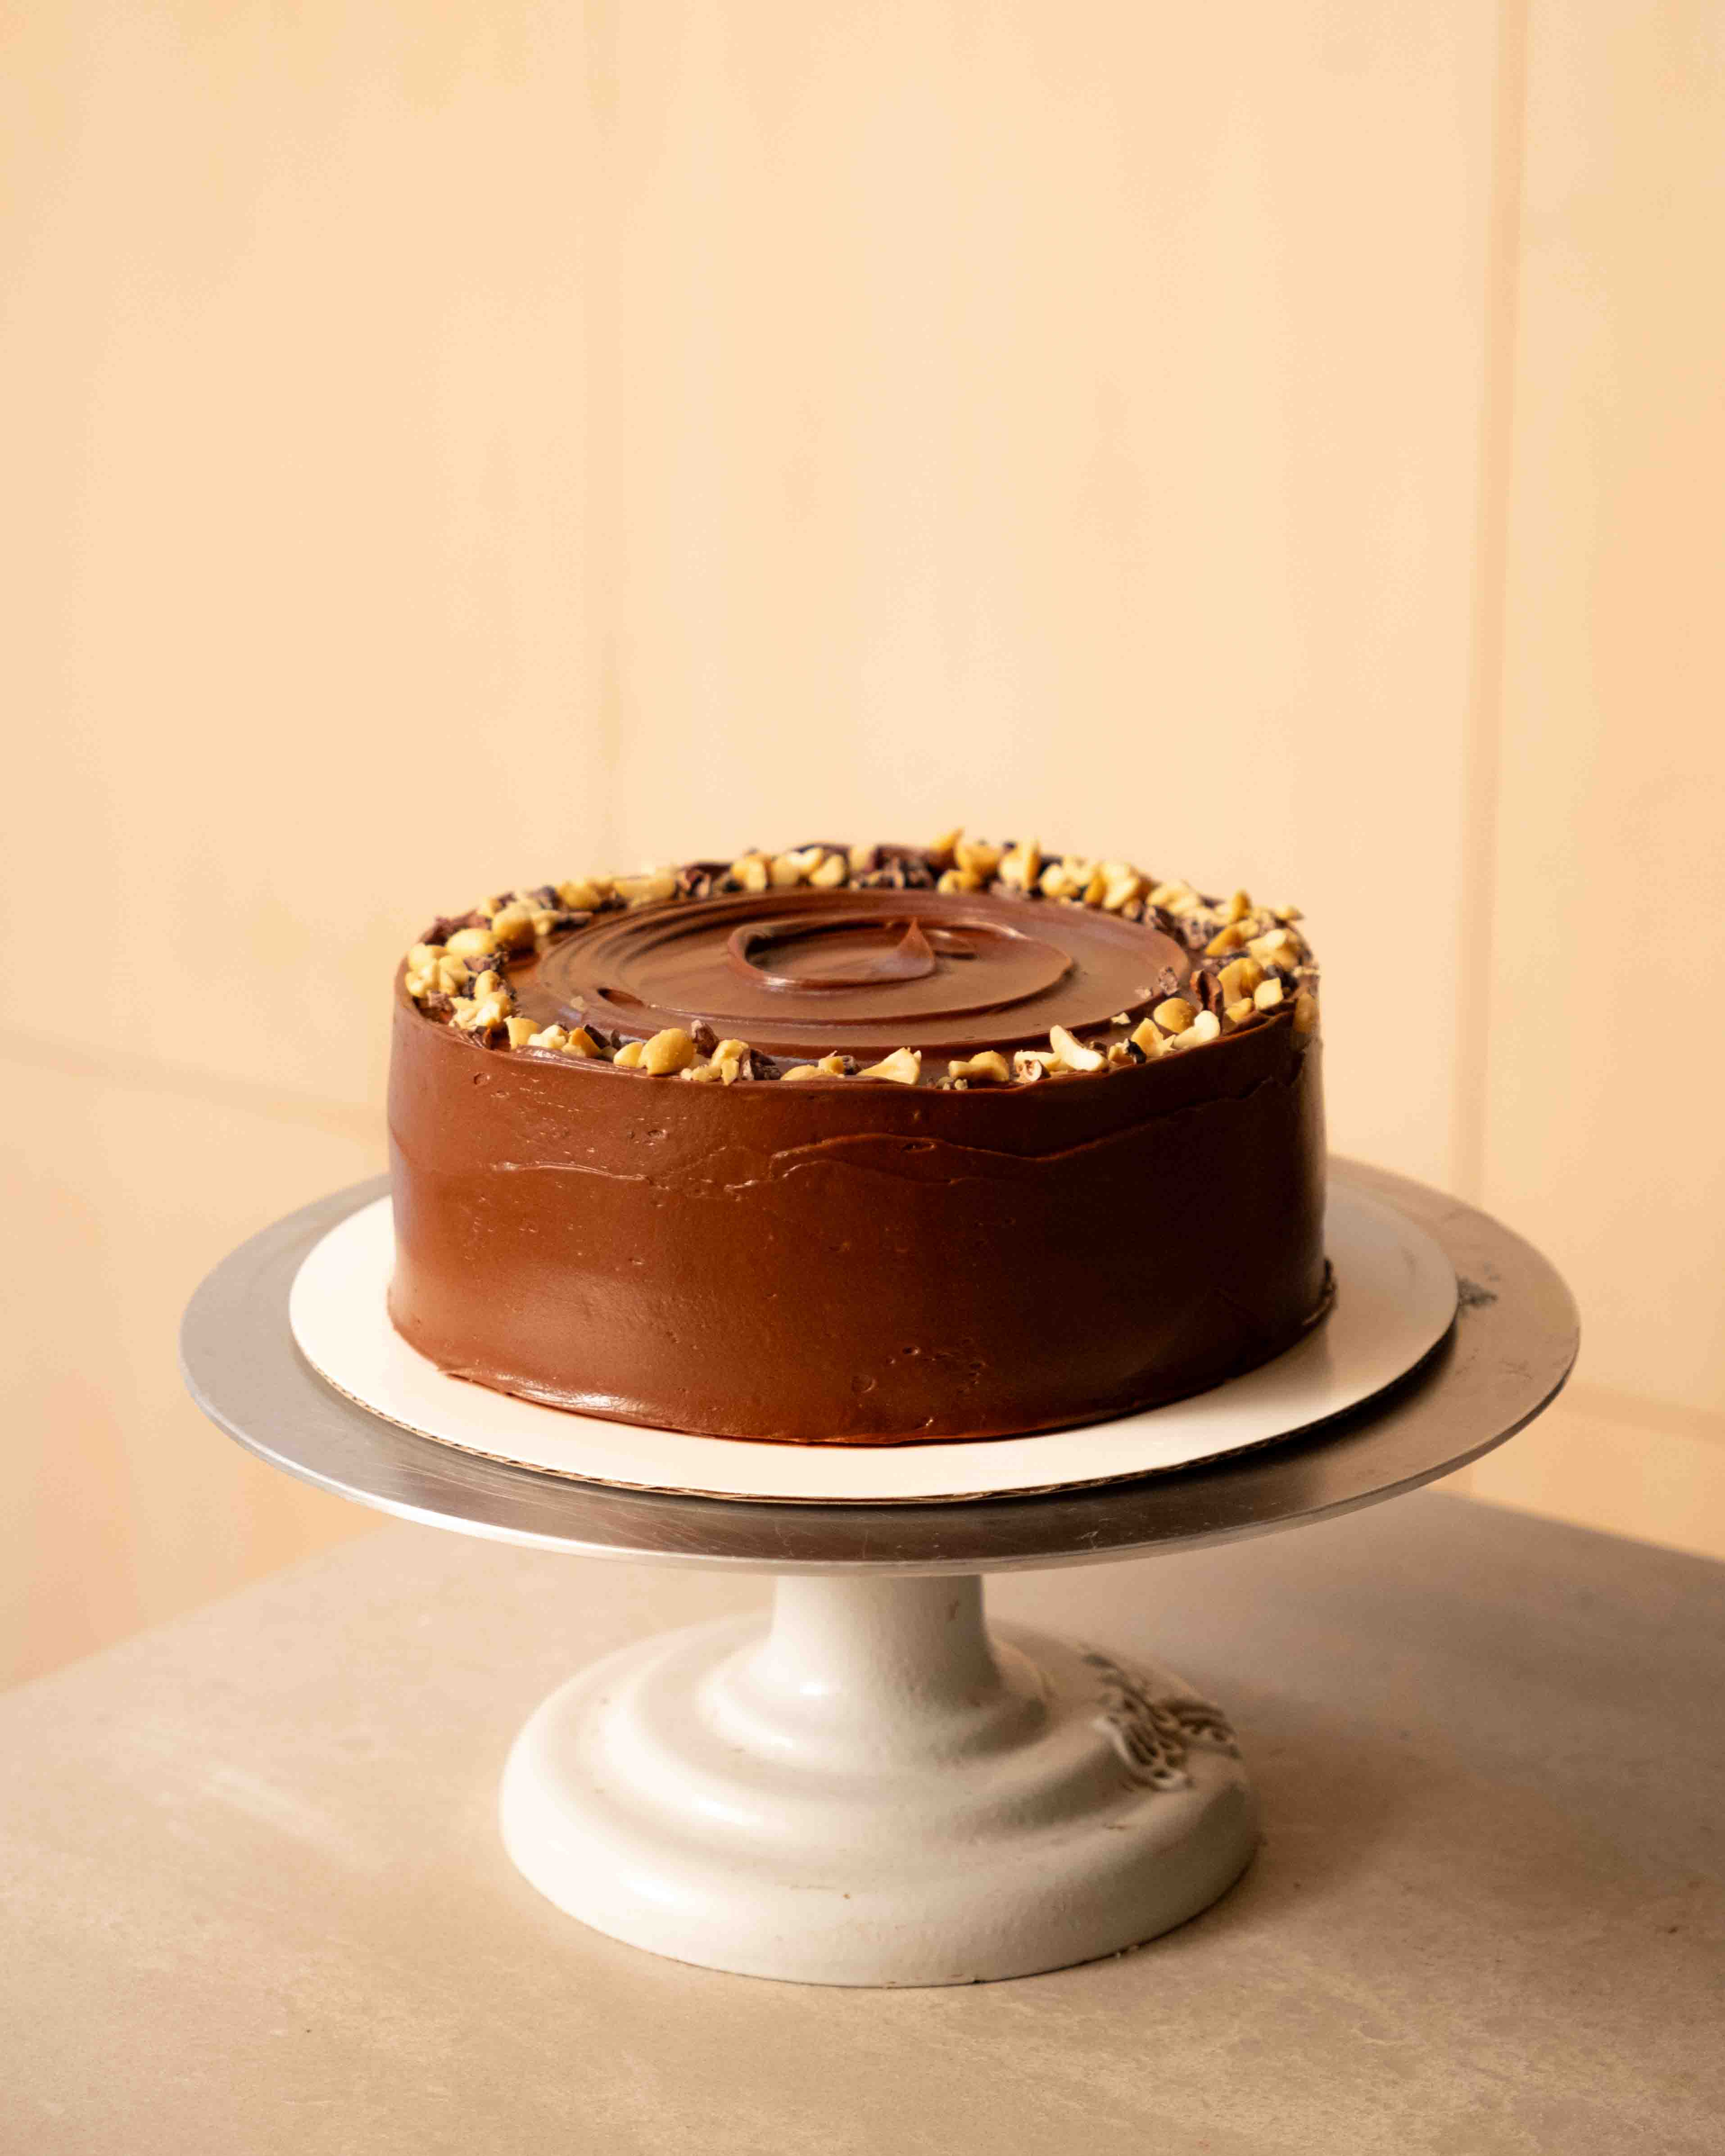
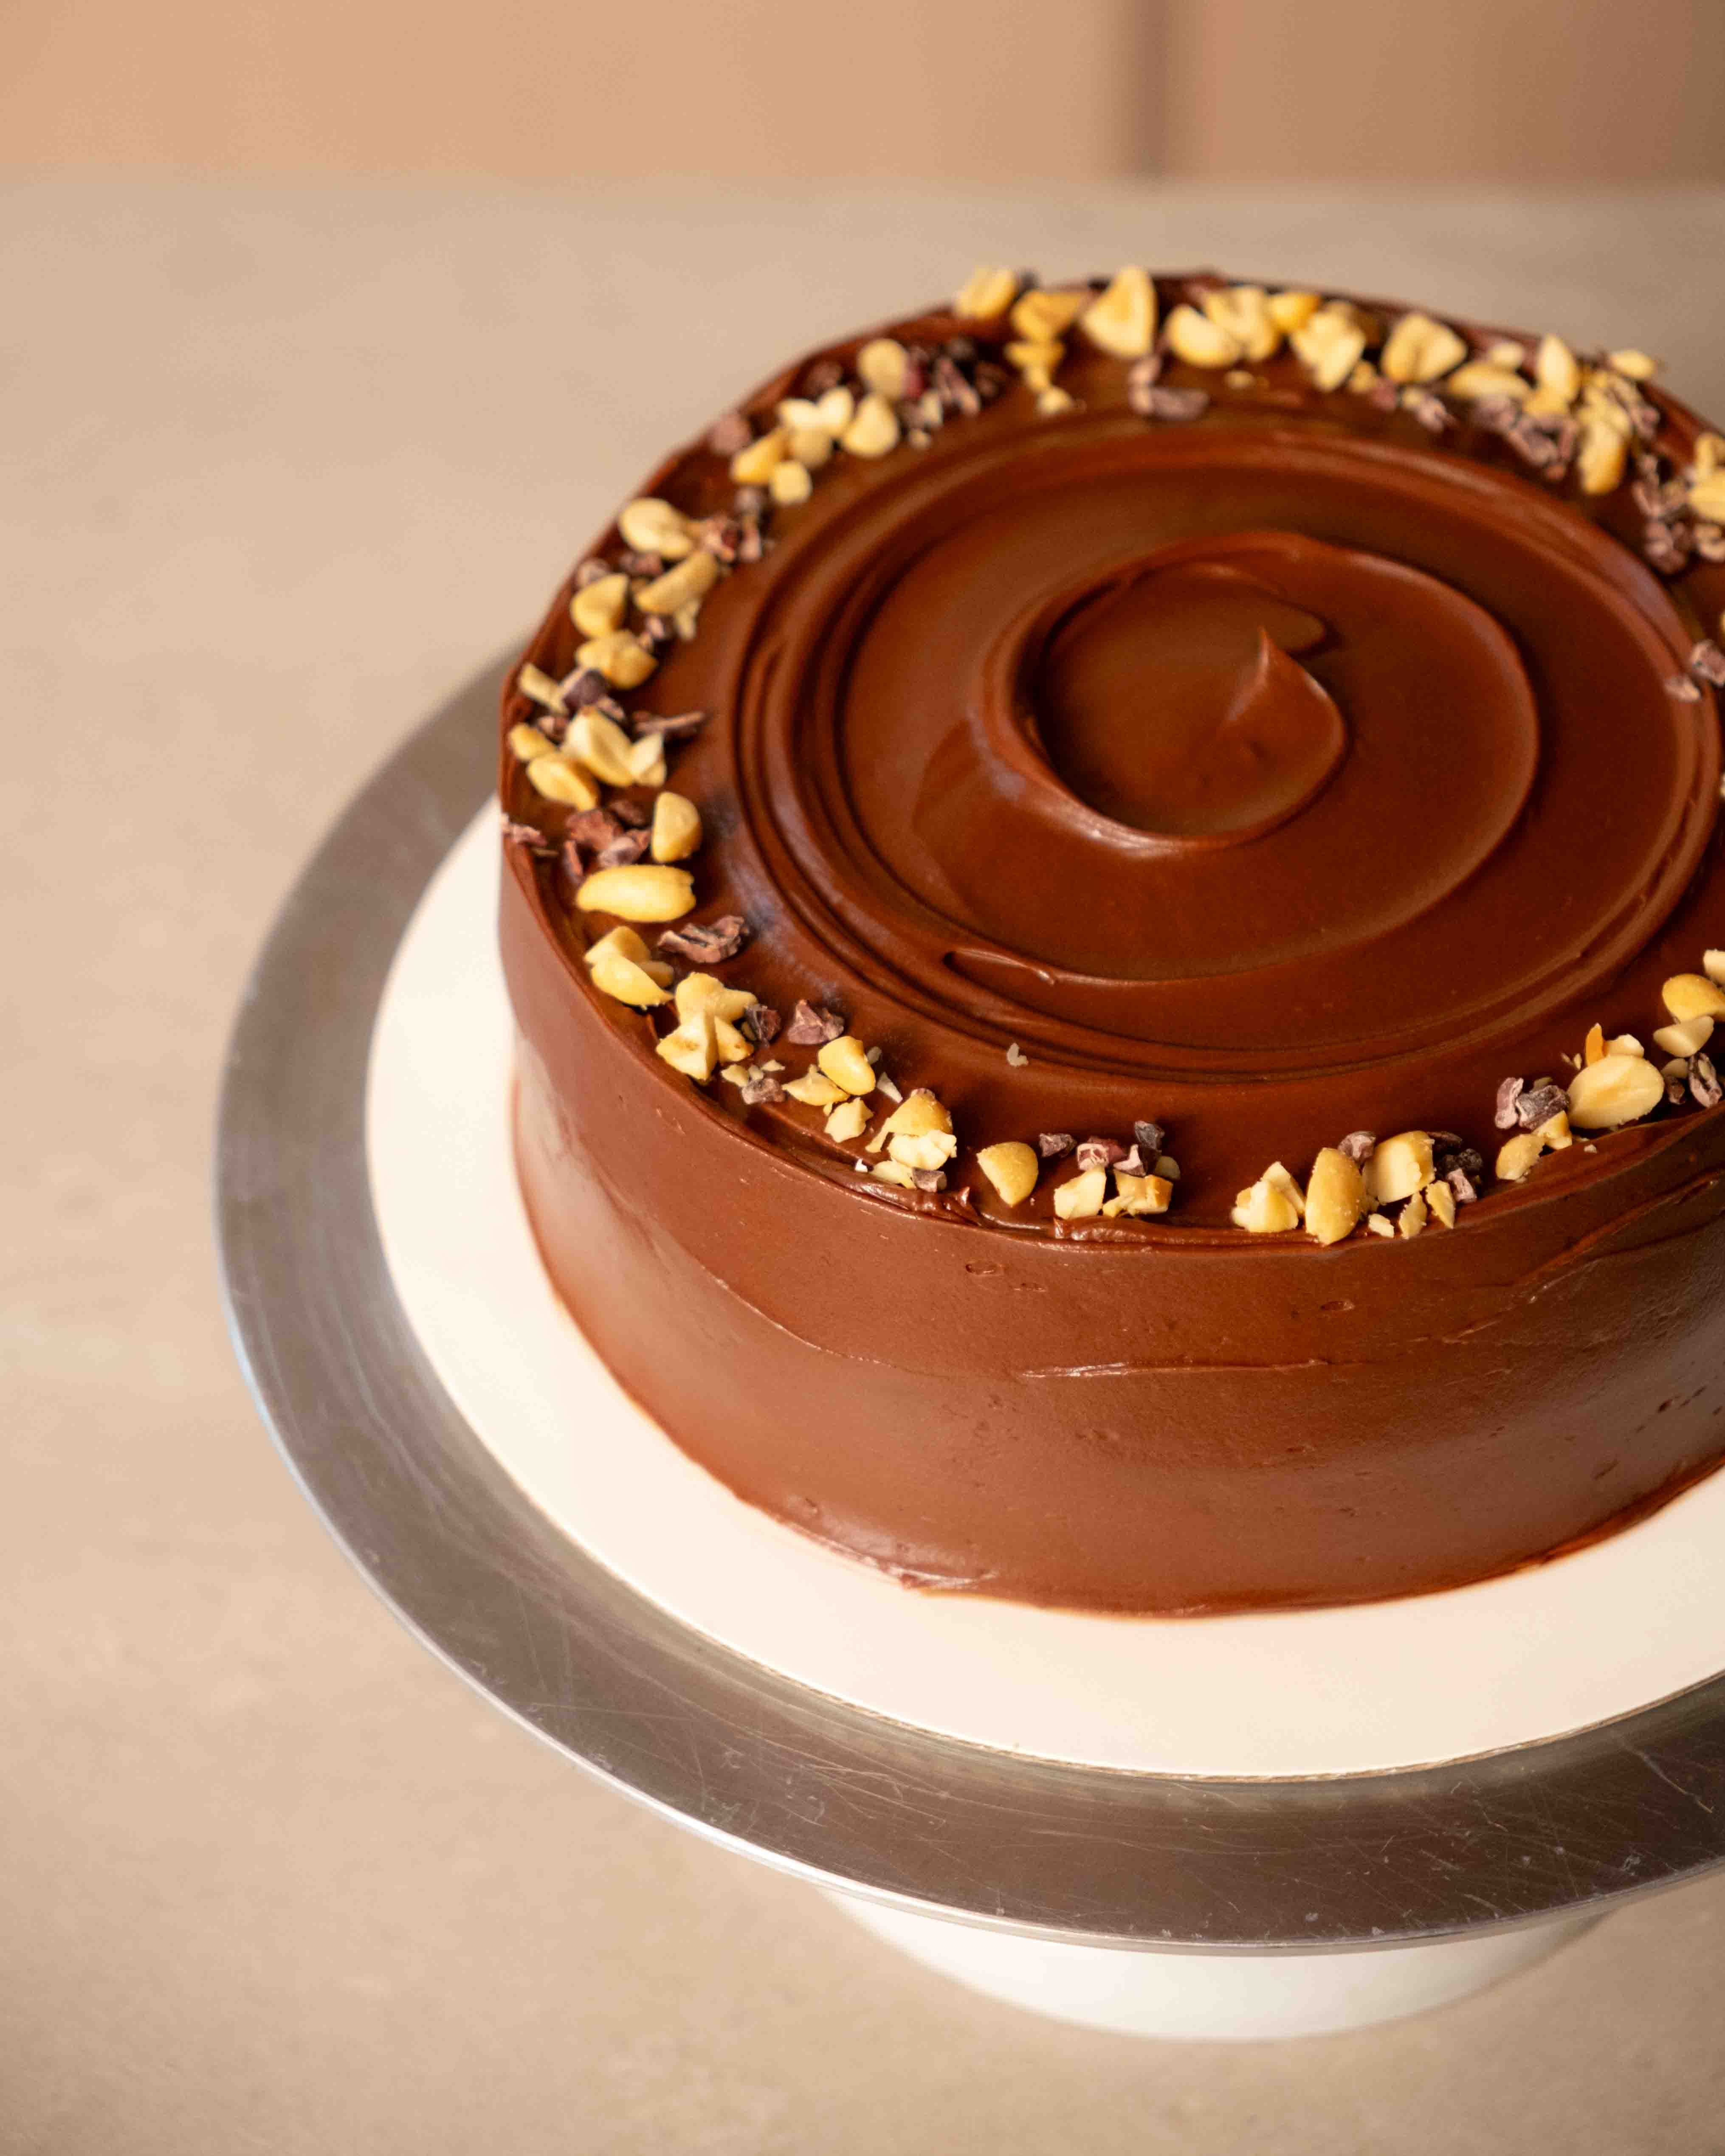
I also seem to have been on a bit of a birthday cake roll recently. There was the Guinness cake I made for my neighbour, and this past week, it was my father-in-law’s 70th birthday. We were going away for a long weekend with the family, and I was, of course, tasked with bringing the cake. It was a small family affair, so the cake didn’t need to be anything grand in scale, but I still wanted to make something special in terms of flavour. My father-in-law loves Snickers and all things chocolate and peanut, so obviously that was my starting point.

To start, the base of this recipe was flavoured with malt, resulting in a cake that is very tender and moist with a beautiful, warm toasty flavour. I wanted to double down on the toasty vibes (someone recently called me the king of roasty toasty flavours, so I guess I am just trying to live up to that mantle), so I layered the cakes with a brown butter cream cheese frosting. To get the peanut flavour into the cake, I used a salted peanut praline paste, home-made so that it still had a little texture. To finish, the cake was coated in a very buttery ganache made with both dark and milk chocolate.
The ganache is based on a recipe I have been making for over 15 years. Originally, this was part of a family recipe, known simply as ‘Canadian Cake’. Not because the frosting is particularly Canadian (although they do love butter), but simply because it came from my family in Canada. Made with more butter than you’d find in most ganaches, the resulting mixture is the perfect texture for frosting a cake. But, because of its high fat content, the ganache can be a little tricky; make sure to follow all the advice below to achieve a perfectly smooth ganache.
If this recipe is the sort of thing you like then you’ll absolutely love my new book, which is out in March and available to pre-order now, anywhere books are sold!
Salted Peanut and Malt Chocolate Cake
Serves 10
Malt Cake Layers
285g plain flour
4 tbsp malted milk powder (I used Horlicks)
1 tsp baking powder
1/4 tsp bicarbonate of soda
1/2 tsp fine sea salt
115g unsalted butter, melted
70ml olive oil
165g caster sugar
165g light brown sugar
4 large eggs
165ml buttermilk
Salted Peanut Praline
65g caster sugar
1 tbsp water
65g salted peanuts
Brown Butter Cream Cheese Frosting
50g unsalted butter, diced
100g icing sugar
Pinch fine sea salt
1/2 tsp vanilla bean paste
50g cream cheese, full-fat
Chocolate Ganache Frosting
150g unsalted butter, diced
100g dark chocolate, around 65-70% cocoa, finely chopped
85g milk chocolate, around 40-45% cocoa, finely chopped
2 tbsp golden syrup (or honey)
125ml double cream
To make the cake layers, preheat the oven to 180ºC (160ºC Fan). Lightly grease 2x20cm round cake tins and line the bases with parchment paper.
The cake is made with the muffin method, so we simply need to combine the wet and dry ingredients separately before combining them. In a large bowl, whisk together the flour, malted milk powder, baking powder, bicarbonate of soda and salt. In a separate bowl, whisk together the butter, oil, sugars, eggs and buttermilk, whisking until smooth.
Tip: If you are using an unrefined muscovado sugar, you may want to sieve it before adding to the other ingredients. This sugar’s higher molasses content makes it more prone to forming clumps that won’t break up easily during mixing.
Add the dry ingredients to the bowl with the liquid ingredients and gently whisk just until a smooth cake batter is formed. Divide the batter evenly between the prepared cake pans (best done by weight).
Bake in the preheated oven for about 28-30 minutes or until the cakes spring back to a light touch. Remove and set aside for 15 minutes before carefully inverting onto wire racks to cool completely.
To make the praline line a baking tray with parchment paper. Add the sugar and water to a small saucepan and place over medium heat. Once the sugar has dissolved, tip in the peanuts and stir constantly until the sugar starts to crystallise and the peanuts have a white sandy coating. Continue stirring until the sugar begins to caramelise, and the coating on the nuts becomes a rich coppery brown. Scrape the caramelised peanuts onto the baking tray and set aside until fully cooled, at least 30 minutes. Add the peanuts to the bowl of a food processor and pulse until the mixture has broken down into a paste-like texture; it should look almost like a coarse peanut butter. Scrape the praline paste into a small bowl and set aside for the moment.
Tip: When making a praline paste like this, you can choose the finished texture. For this cake, I wanted a little texture, a little graininess. To achieve this, I stop processing the paste once it has become just pourable but before it becomes completely liquid. This means we can spread the praline paste easily, but it won’t easily leak out of the cake.

To make the cream cheese frosting, add the butter to a small saucepan and place over medium heat, cooking until browned. The butter will bubble and splatter. Once it starts to foam, keep an eye out for flecks of brown to appear in the butter, as this is a sign the butter has been successfully browned. Pour into a bowl and refrigerate until the butter has a soft but spreadable texture, about 30 minutes. Place the soft butter into a large bowl and use an electric mixer to beat until soft and pale. Add the icing sugar and beat until the mixture forms a smooth paste. Because the butter has been browned, it contains no liquid, so this mixture can look a little drier than your usual frosting, but that will be corrected by the cream cheese. Add the cream cheese and beat just until the frosting is smooth and silky.
To assemble the cake, place one of the layers onto a large plate or cake stand and top with the frosting, using a small offset spatula to spread it over the surface of the cake, trying to form a small dam around the edge of the cake, which will help contain the praline paste. Spoon the paste atop the frosting and spread to cover. Top with the second cake layer and set aside whilst you make the ganache.
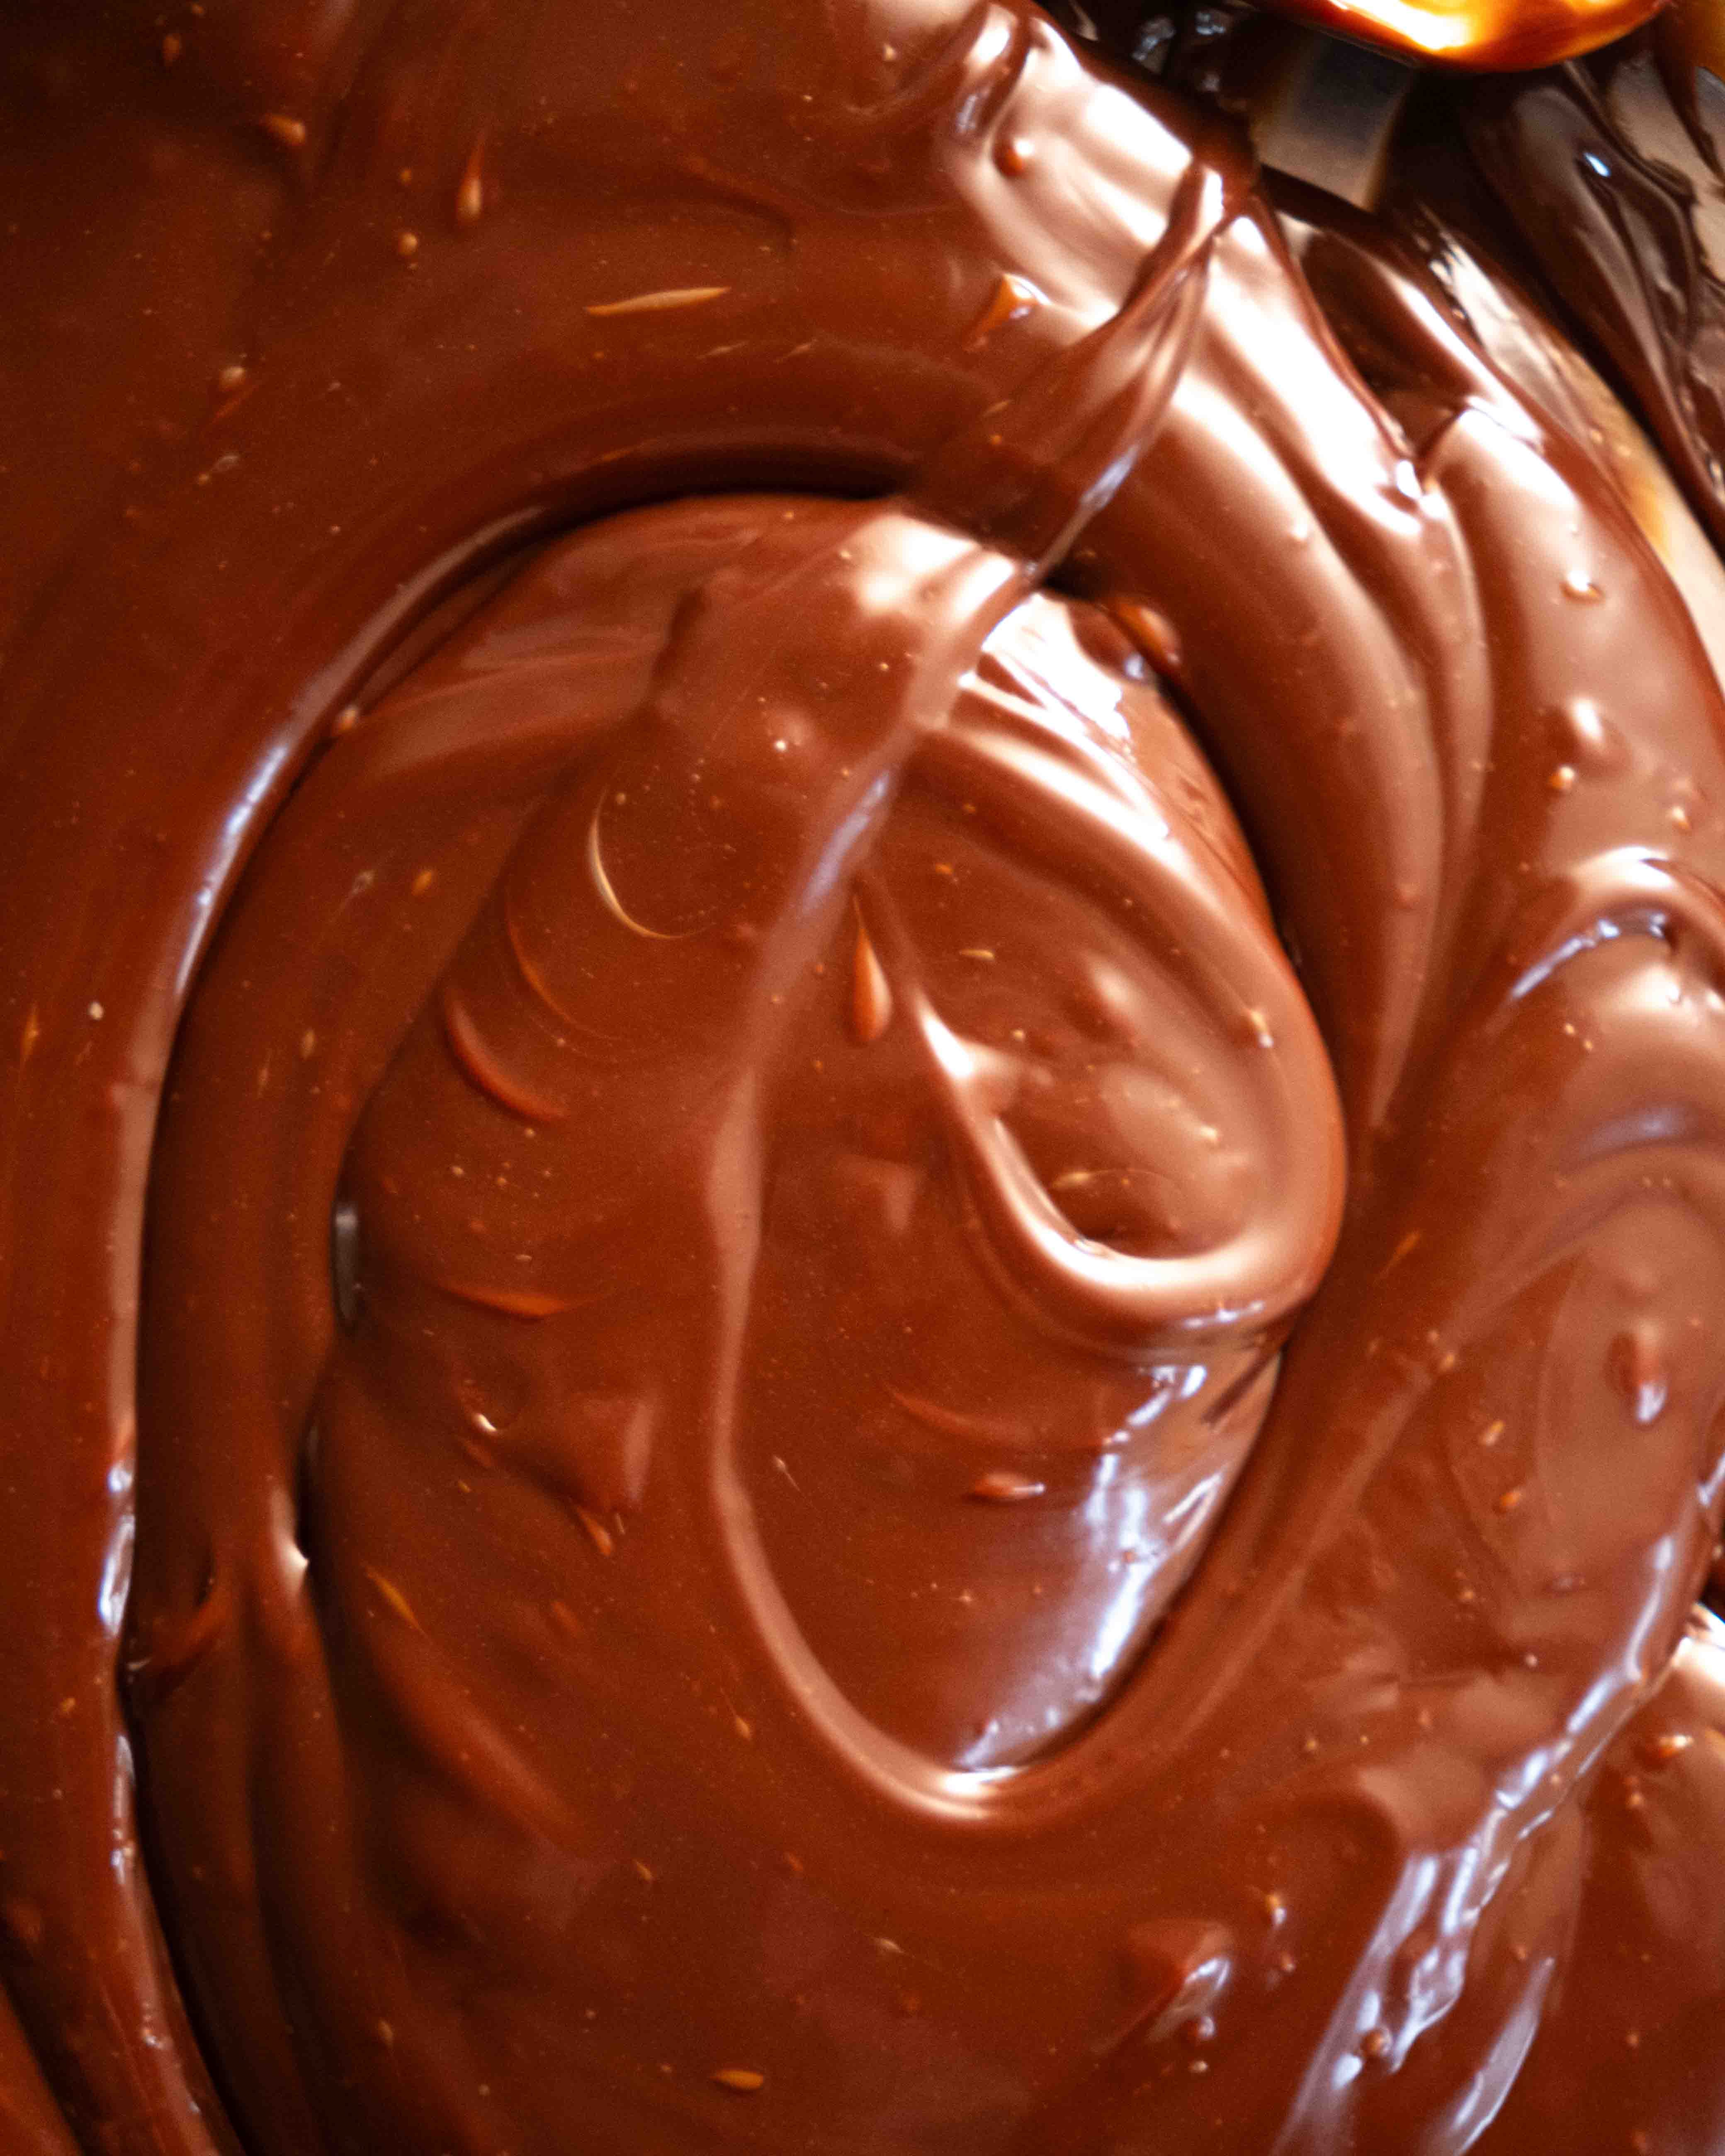
Add the butter and two chocolates to a large bowl and heat, using either a bain marie or microwave, until everything is fully melted. Meanwhile, add the cream to a small saucepan and place over medium heat and cook until it simmers. Remove the bowl of chocolate from the heat and pour in the cream, whisking together until a silky smooth ganache is formed. Because this ganache is high in fat, I like to take the additional step of finishing the ganache with an immersion blender, which helps to ensure a properly emulsified ganache. Set aside at room temperature until thick but spreadable.
Tip: When using an immersion blender to emulsify the ganache, try to keep the head of the blender under the surface of the ganache to prevent aerating the mixture. To make this easier, I like to pour the melted chocolate mixture into a jug before adding the cream.
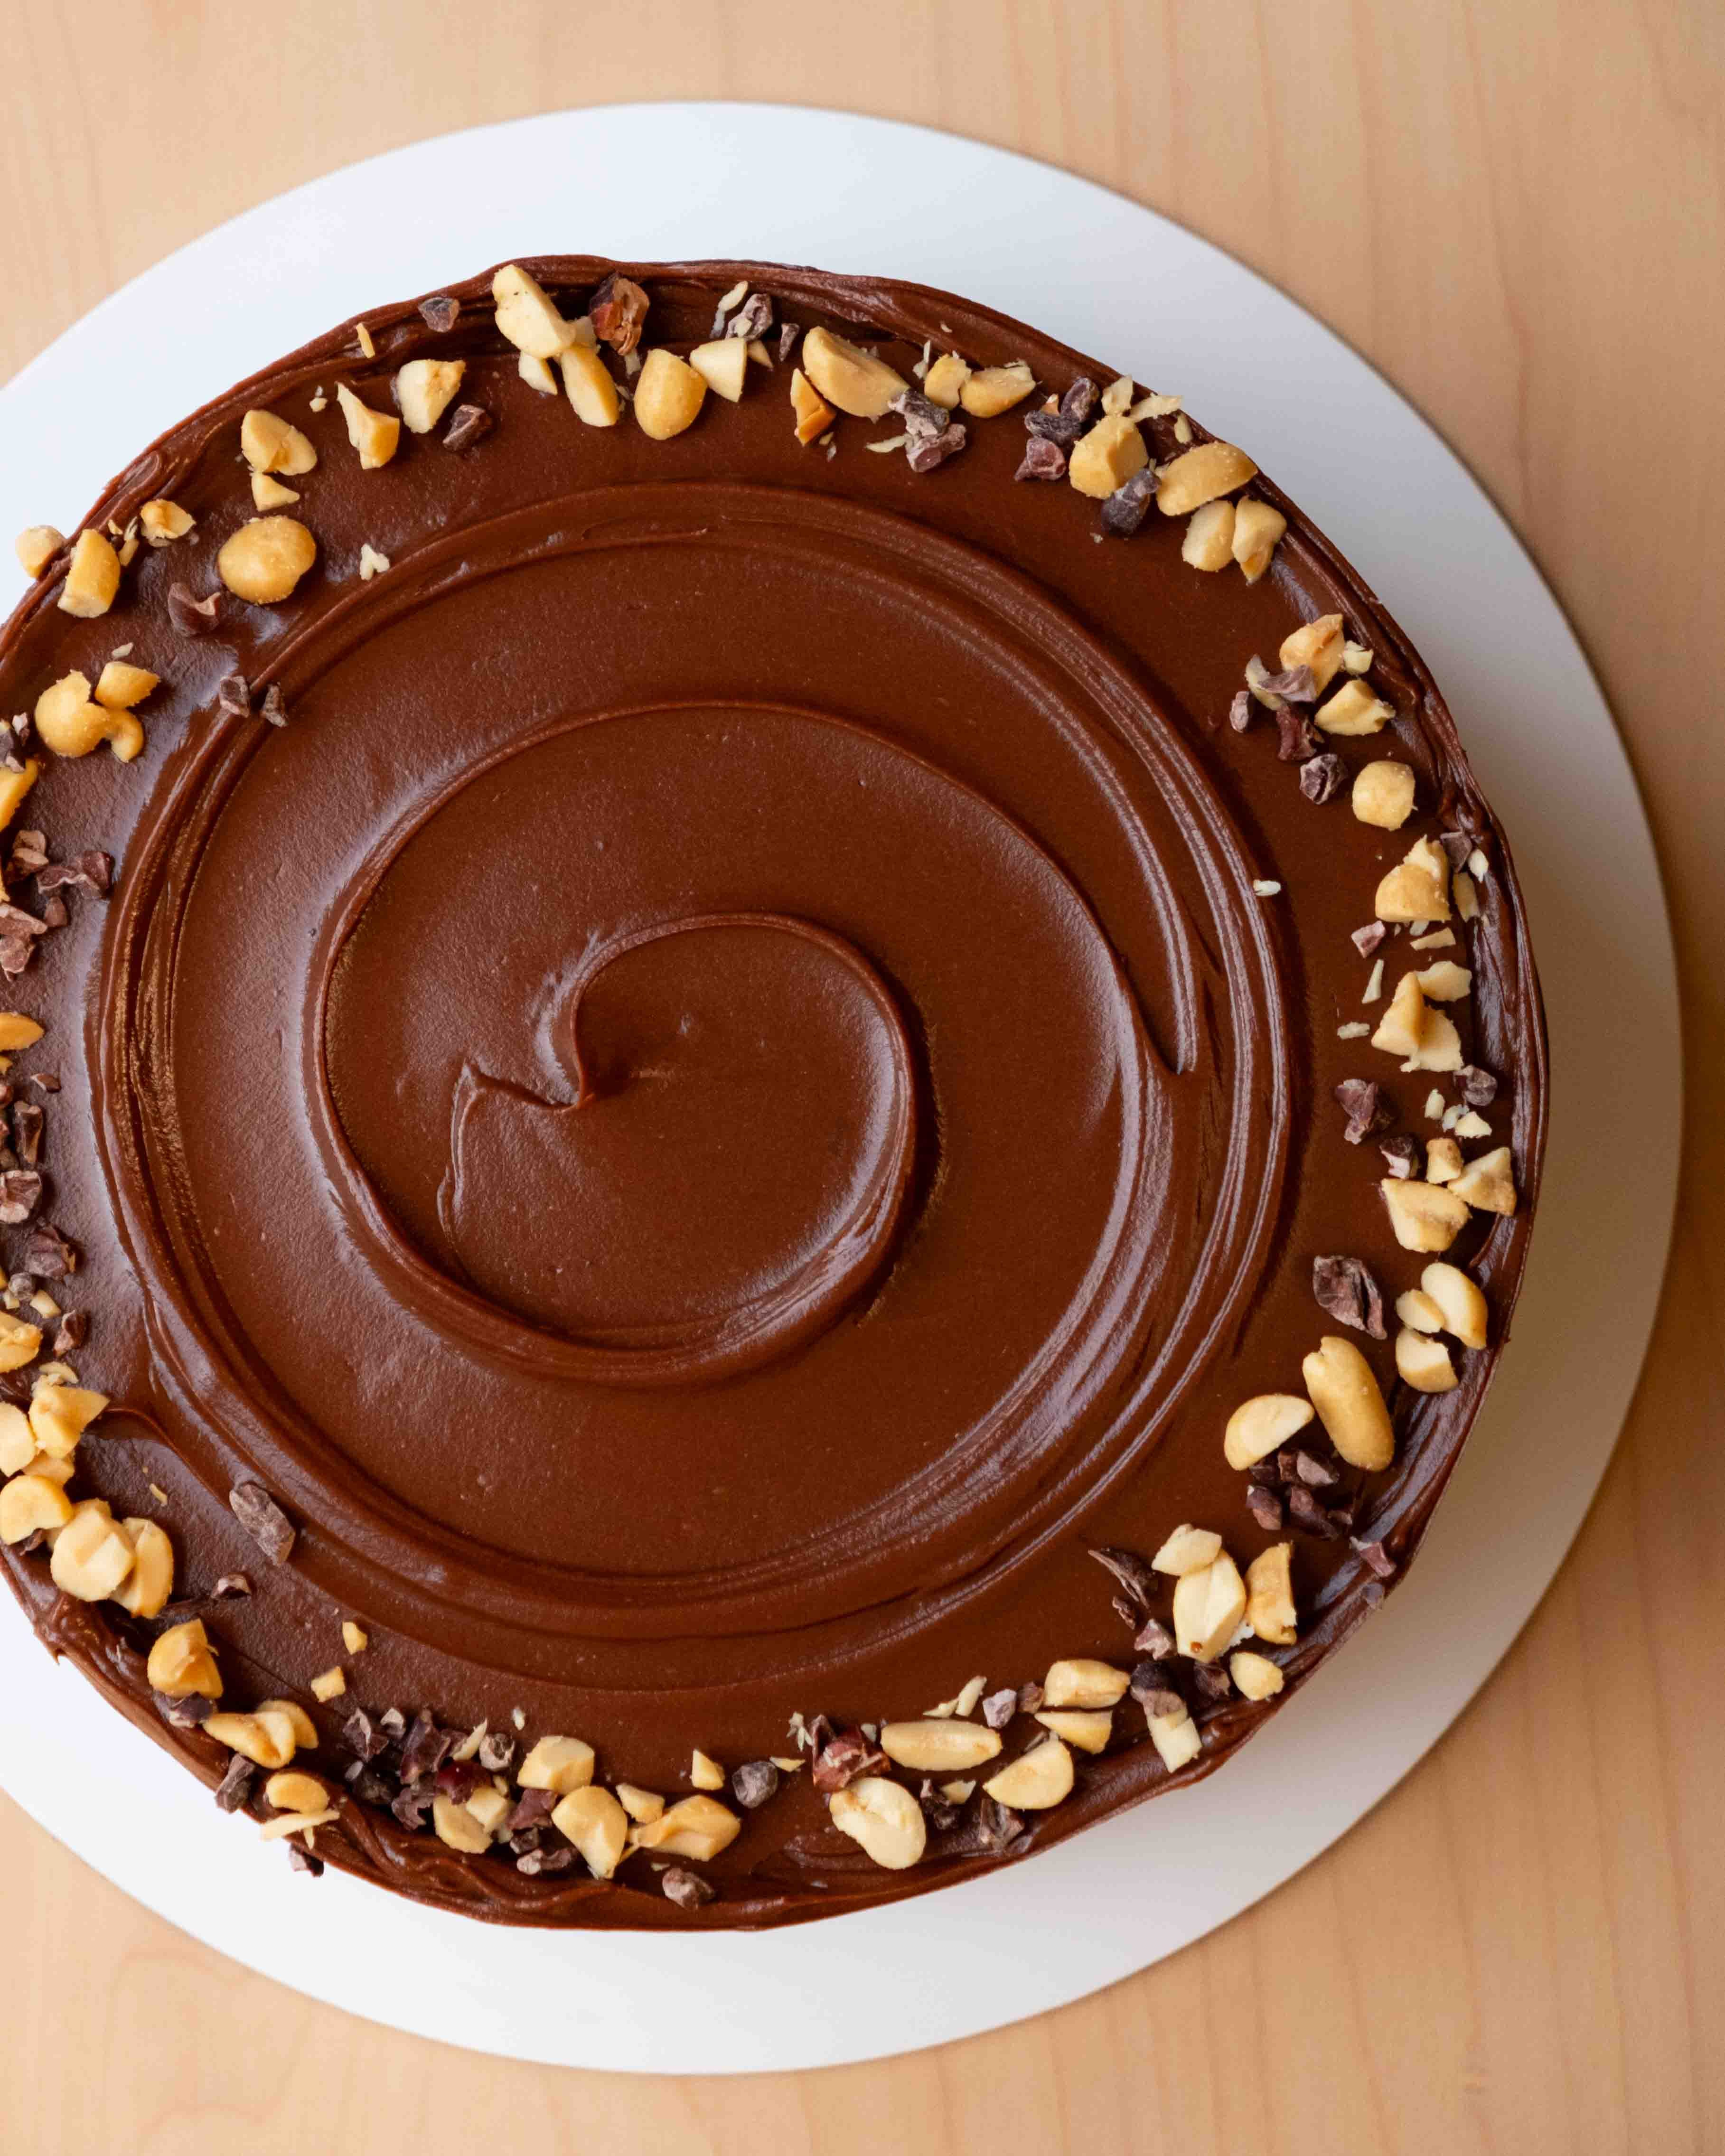
To finish the cake, spread the ganache over the top and sides of the cake. To finish, I like to decorate with a few additional peanuts and some cocoa nibs.
Kept covered, the cake will keep for at least 3 days.
All I heard in that excess of experience was "she must be very, very old". :-D Birthday week trauma activated! Thanks so much for the shout out. Appreciate it really! Lots of love xx
I made this for my 12 year old's birthday today (she loves a Snickers). It is extraordinarily good, thank you!