Something(s) for the weekend - Second Helpings #19
Your weekend menu sorted
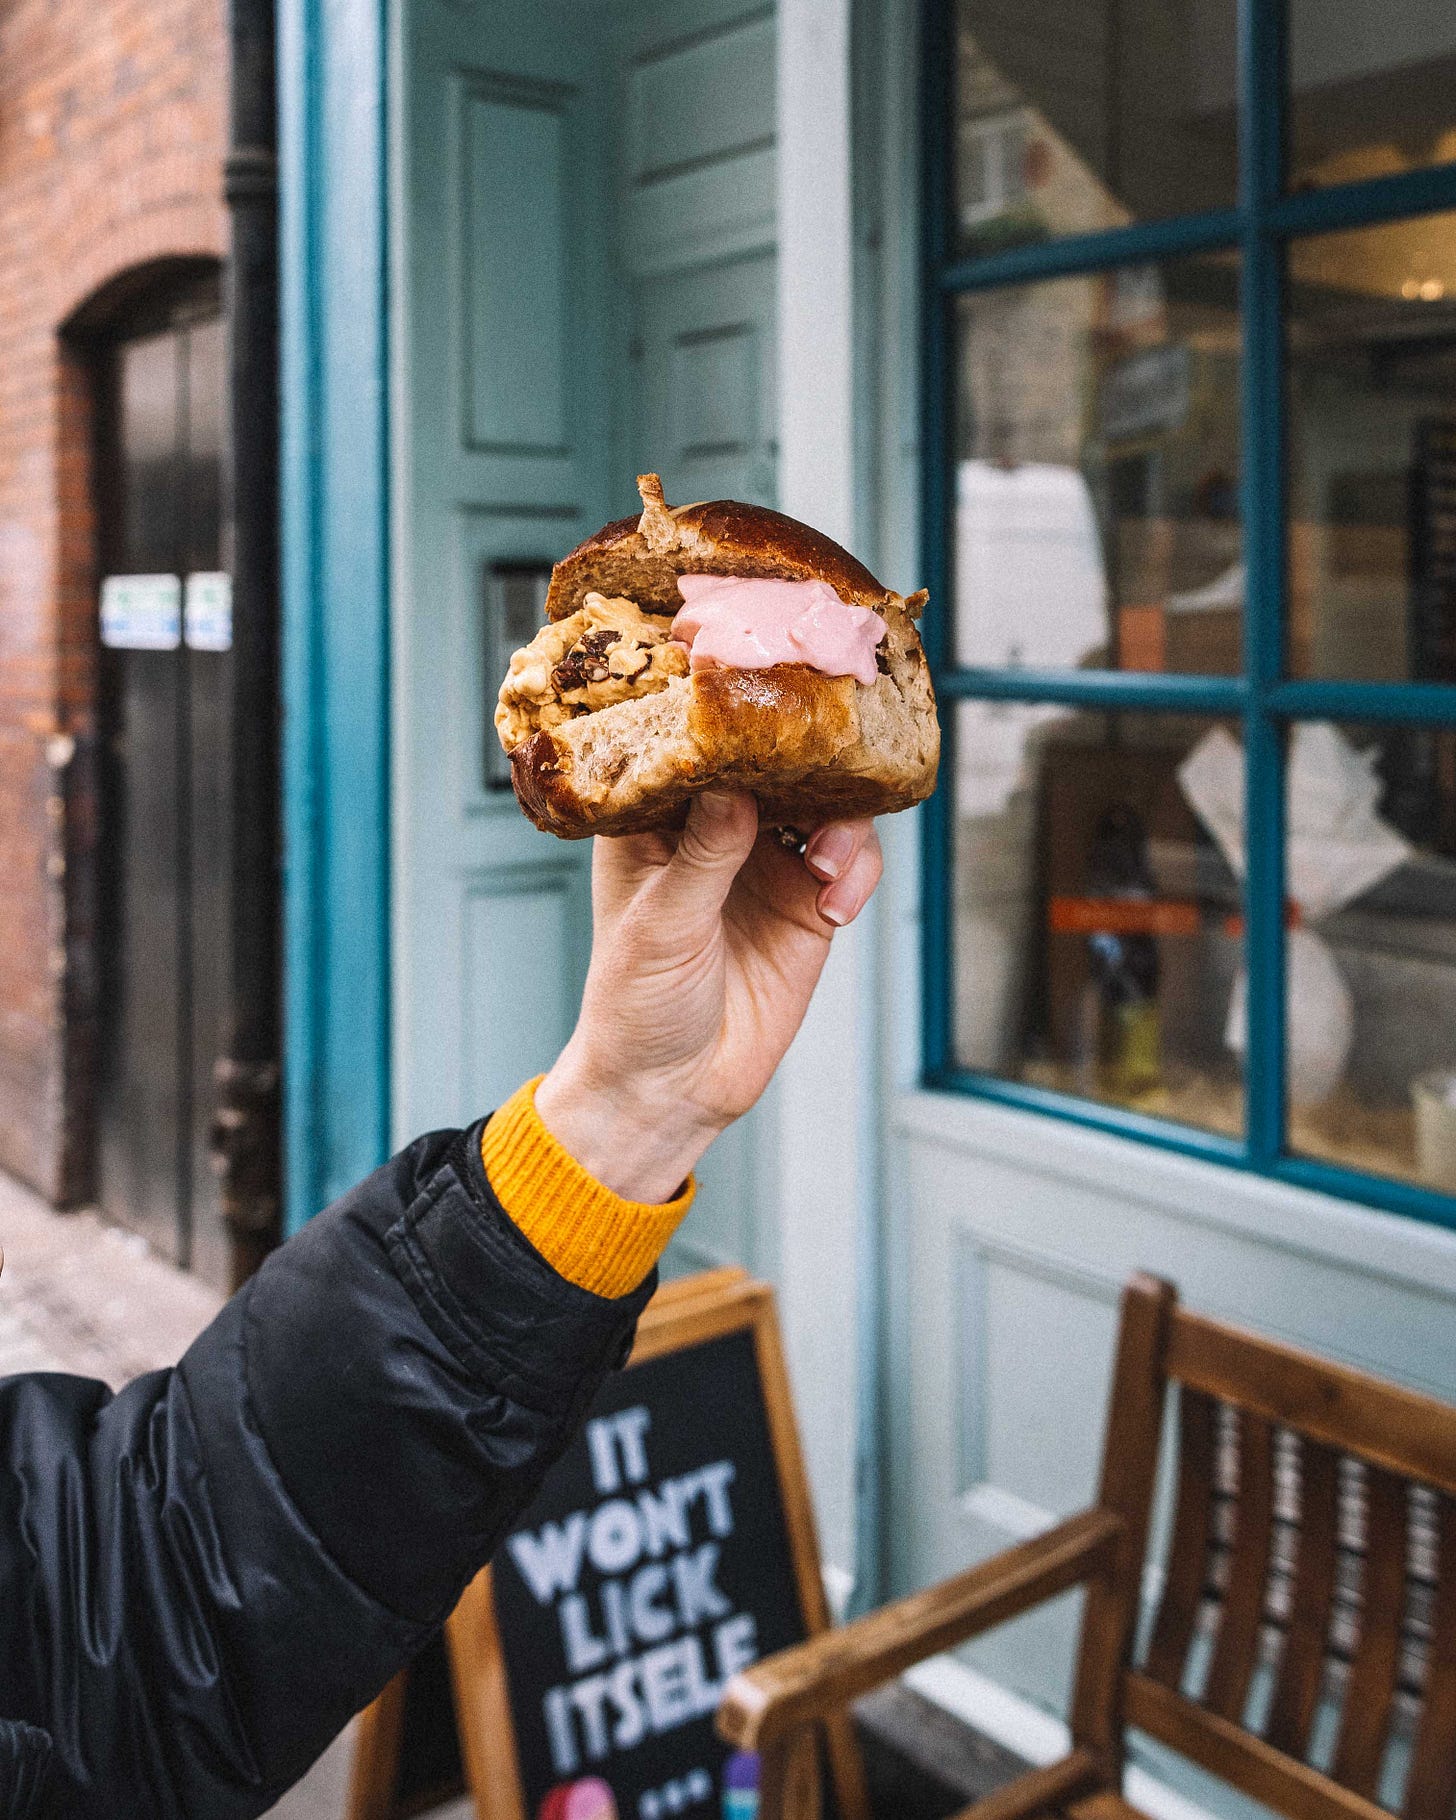
As Easter creeps closer the amount of hot cross buns I have consumed slowly ticks up too, lets not talk about the actual number though. Last year you might remember I joined my friend Jen, who writes the excellent ‘The Next Delicious Thing’ newsletter, to taste some of London’s best hot cross buns, trying to find the best. We planned on a rematch, but couldn’t find the time to do it. Instead, we caught up over a hot cross bun gelato collab, at Gelupo. Gelupo, for those who don’t know, is one of London’s premier producers of gelato and their little shop in soho is always worth a visit (as is their sister restaurant Bocca Di Lupo, across the street). This year, for Easter, they’ve partnered up with the bakery Jolene, another favourite, to offer a fun twist on the classic Gelato Con Brioche, the Sicilian dessert which takes butter rich brioche and stuffs it full of gelato. For this collab Gelupo provide the gelato and Jolene the hot cross buns, standing in for the brioche. It’s safe to say the combo works wonderfully and makes for a rather special Easter treat. For the collab Gelupo have also started making a stem ginger gelato which works particularly well for this but you can choose whichever flavour you like as the filling, choosing up to two flavours. The collab is available from Gelupo in Soho now through 10th April.
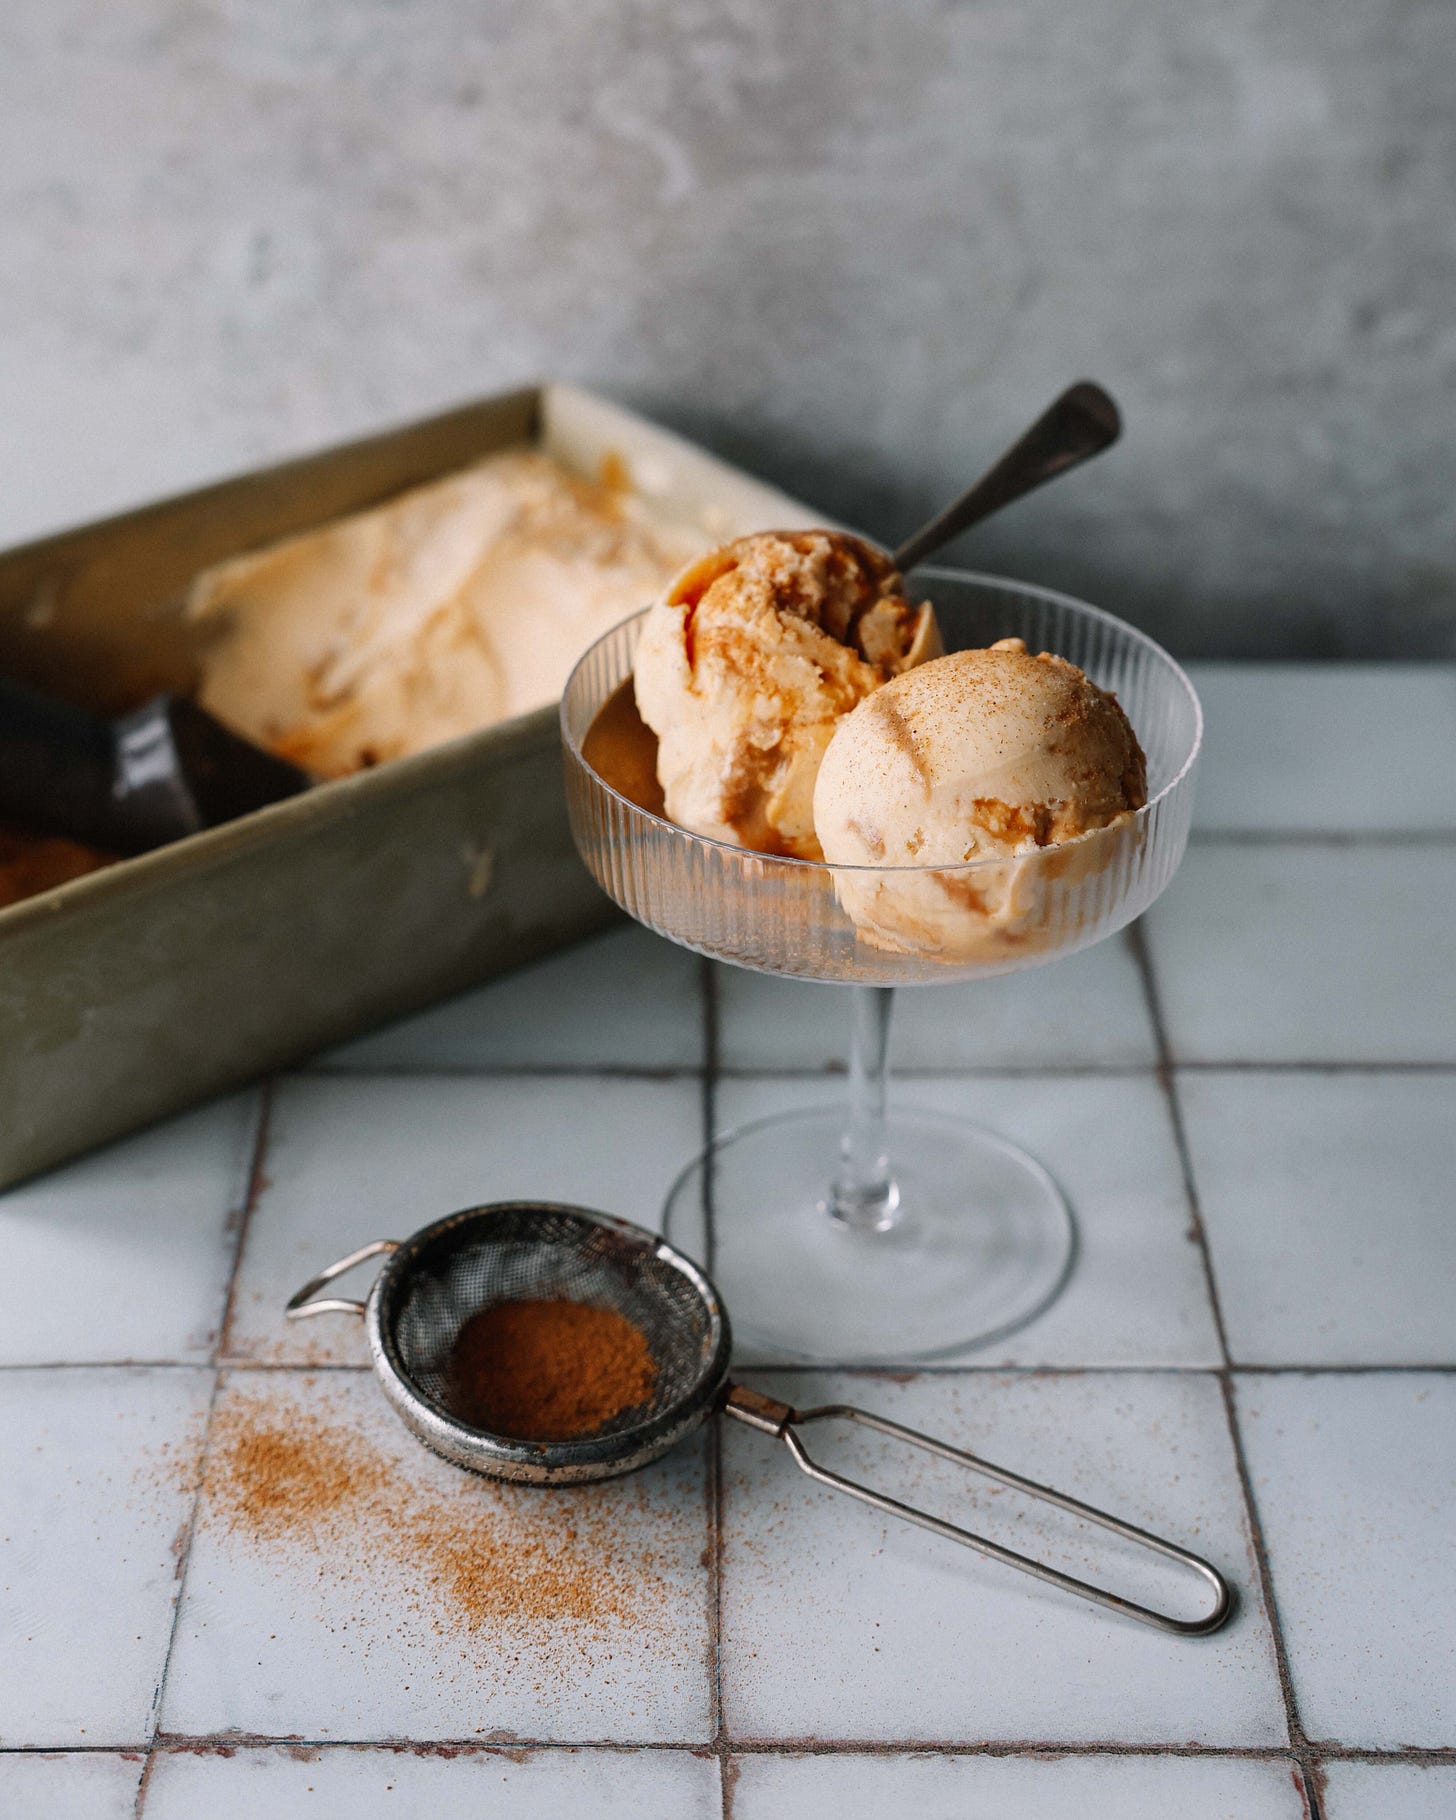
Horchata Ice Cream with Dulce de Leche Swirl
Talking of ice cream, I clearly have the frozen stuff on my mind, because I have a fabulous new recipe for you. I wanted to make something inspired by Horchata, the rice based drink made with cinnamon, and ice cream seemed like a logical vehicle.
Horchata is a drink of Spanish origin, made traditionally by soaking tiger nuts in water and then blending and straining to make a delicious drink. My first encounter with the drink, and the version I’ve come to love, is what’s made in Mexico, white rice and cinnamon soaked in water and blender to form the most refreshing drink. Perfect to accompany spicy dishes, to cool your palette, it’s also a great summertime drink. Horchata varies in flavour, depending on where in the world you are. Some countries in South America make it with sesame seeds or melon seeds. Some with different types of nuts like peanuts or almonds. But today were concentrating on the rice version.
To make my horchata ice cream the base starts much like the drink. Rice and cinnamon sticks are lightly toasted in a dry saucepan and then added to a blend of milk and cream. I then use my Wilfa Powerfuel XL blender to briefly blitz the mixture, breaking apart the rice and cinnamon to help the flavour infuse into the dairy base. The Wilfa blender can blitz this in 5 seconds, thanks to its incredibly strong motor and speedy blade. Once infused the base is passed through cheese cloth, or a nut milk bag, squeezing every drop of liquid out into a bowl. This is used to make a classic egg yolk custard and then churned to make a delicious ice cream. To gild the lily, the ice cream is swirled with salted dulce de leche.
After making ice cream, Mike requested pizza. Ice cream and pizza, the perfect Saturday pairing, and something I’ll never say no to. Normally I would get myself organised and make the pizza dough the day before, but I wanted to test out an idea for a same day dough which would still turned out perfect pizza. The recipe, which I’ve tested a few times now, turns out amazingly light pizza with a wonderfully puffy crust. That recipe is below for Second Helpings subscribers.
Horchata Dulce de Leche Ice Cream
Ice Cream Base
150g white rice
2 cinnamon sticks
500ml double cream (plus a little extra)
250ml whole milk (plus a little extra)
125g caster sugar
6 large egg yolks
Pinch of salt
1 tsp vanilla bean paste
Dulce de Leche Swirl
100g dulce de leche
Pinch flaked sea salt
To make the flavour base for the ice cream, place the rice and cinnamon sticks, which have been broken in half, into a dry frying pan and, over low heat, toast until the mixture is fragrant and the rice has taken on a very minimal amount of colour. Don’t be tempted to toast this mixture too much as when the rice gets too much colour it can add notes of bitterness which you don’t want. Whilst toasting the rice, add the cream and milk to a saucepan and place over medium heat. Add the rice mixture to the milk mixture and continue cooking just until the milk comes to a simmer. Pour the milk mixture into the jug of a blender, I use my Wilfa Powerfuel XL, and blitz briefly to break up the rice and cinnamon to a very coarse like porridge mixture. In the Wilfa Powerfuel XL this will takeabout 5-10 seconds, if using a different blender this may take longer. The Wilfa blender has an incredibly powerful motor and makes more than 3000 revolutions a minute so is incredibly effective. Set the blender jug aside for an hour to allow the base to infuse.
Place a couple layers of cheesecloth, or use a nut milk bag, in to a fine mesh sieve and pour in the infused ice cream base. Gather up the edges and twist, squeezing out every drop of liquid you can. To make the ice cream, your base needs to measure 750ml and the rice will absorb some moisture that wont pass through the cheesecloth, so you’ll need to add more dairy to bring it back to 750ml. My liquid was off by about 100ml so I added half of this as cream and half of this as milk.
Place your ice cream base, and half of the sugar, into a large saucepan and place over low/medium heat and bring to a simmer. Whilst the base is coming to temperature add the yolks, salt, vanilla and remaining sugar to a large bowl and whisk together to combine.
At this point of the process we need to combine the yolks with the hot ice cream base. Adding hot liquid to egg yolks is a recipe for scrambled egg, so we need to temper the yolks to prevent this from happening. Tempering simply means slowly raising the temperature of eggs to prevent them cooking. To do this you simply introduce the hot ice cream base slowly, whilst whisking the yolks. You can either slowly drizzle in the base from the pan or use a ladle to add the base in small amounts. This allows the temperature to rise slowly meaning it doesn’t have the opportunity to scramble. The custard can then be cooked gently until thickened. To do this, pour the custard back into the saucepan and place it over low heat. Stirring constantly with a spatula, cook slowly until the custard reaches about 80ºC-85ºC. You can judge this with an instant read thermometer or by the texture of the custard. The custard will be cooked when it has thickened enough so that it coats the back of a spoon.
Pour the custard into a bowl set over an ice bath; simply a bowl filled with water and ice in which you can set the smaller bowl. Stir the custard until cooled then cover and refrigerate for at least 4 hours before churning. I generally leave the custard overnight before churning, this rest enhances texture and ensures a smoother finished ice cream.
I freeze the finished ice cream in a loaf pan, so if you remember pop one in the freezer the night before, or at least a couple hours before it is needed. This ensures a very cold vessel for your ice cream which prevents it melting when taking it out of your ice cream machine.
For the dulce de leche swirl, mix the salt into the caramel. Refrigerate until needed.
To churn you’ll need an ice cream machine of some sort. Use the manufacturers instructions, but if using a machine that has a pre-frozen bowl make sure it has been in the freezer AT LEAST 24 hours but preferably longer and if using a fancier machine that has an inbuilt condenser, run it for 10-15 minutes before pouring in the base. The quicker the ice cream can be churned the smoother it tends to be and all domestic machines can run a teensy bit too warm, so ensuring the machine is as cold as possible helps to make the best ice cream.
When the ice cream is finished churning, scrape a third into your pre-chilled loaf pan. Pipe or drizzle in a third of the dulce de leche. Repeat twice more until all of the ice cream and dulce de leche has been used. Immediately cover the ice cream and pop back into the freezer for at least four hours until firm.
Homemade ice cream is best used within two weeks of making.
Same Day Pizza Dough
This pizza dough started as an experiment to see if I could make a really good pizza dough in just one day. I normally make dough which involves a long rest in the fridge; to develop flavour and texture. To skip this and make something which could be made in just one day without losing any quality I turned to a pre-ferment, to a poolish. If you read my schiacciata recipe you’ll know all about this method of bread making.
Keep reading with a 7-day free trial
Subscribe to The Boy Who Bakes to keep reading this post and get 7 days of free access to the full post archives.


