


Second Helpings - The Most Fabulous Doughnut
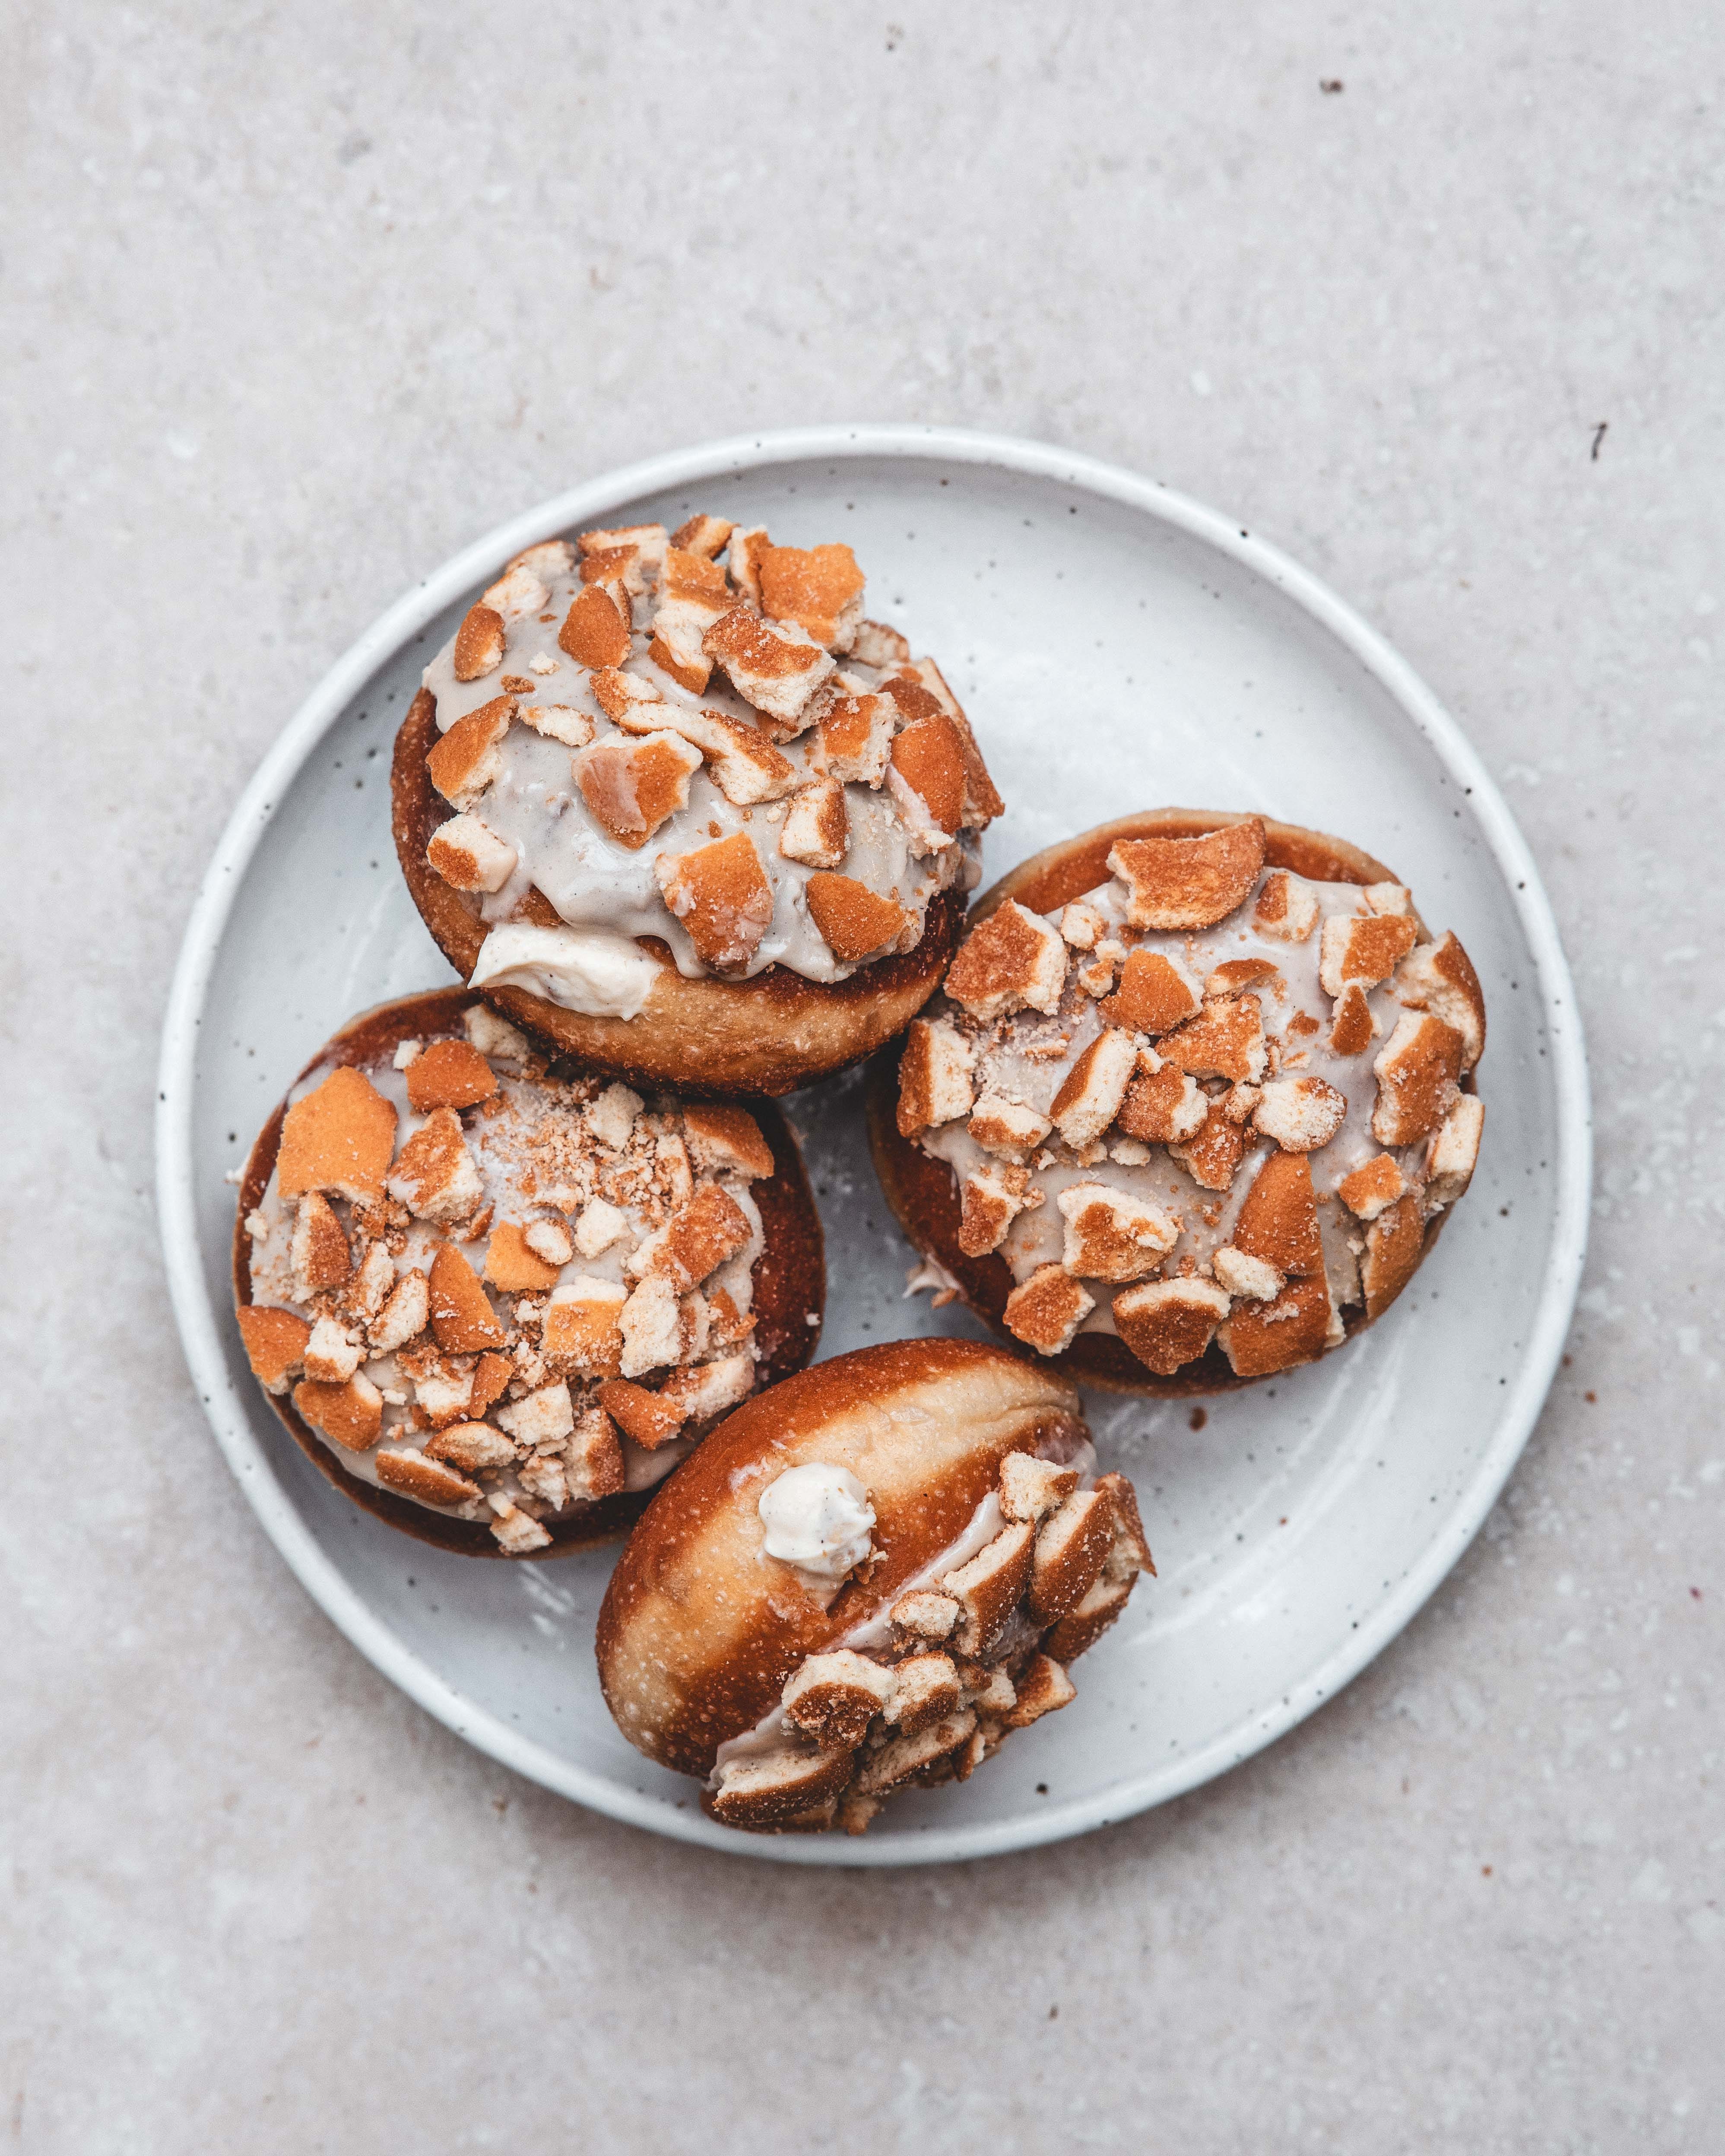
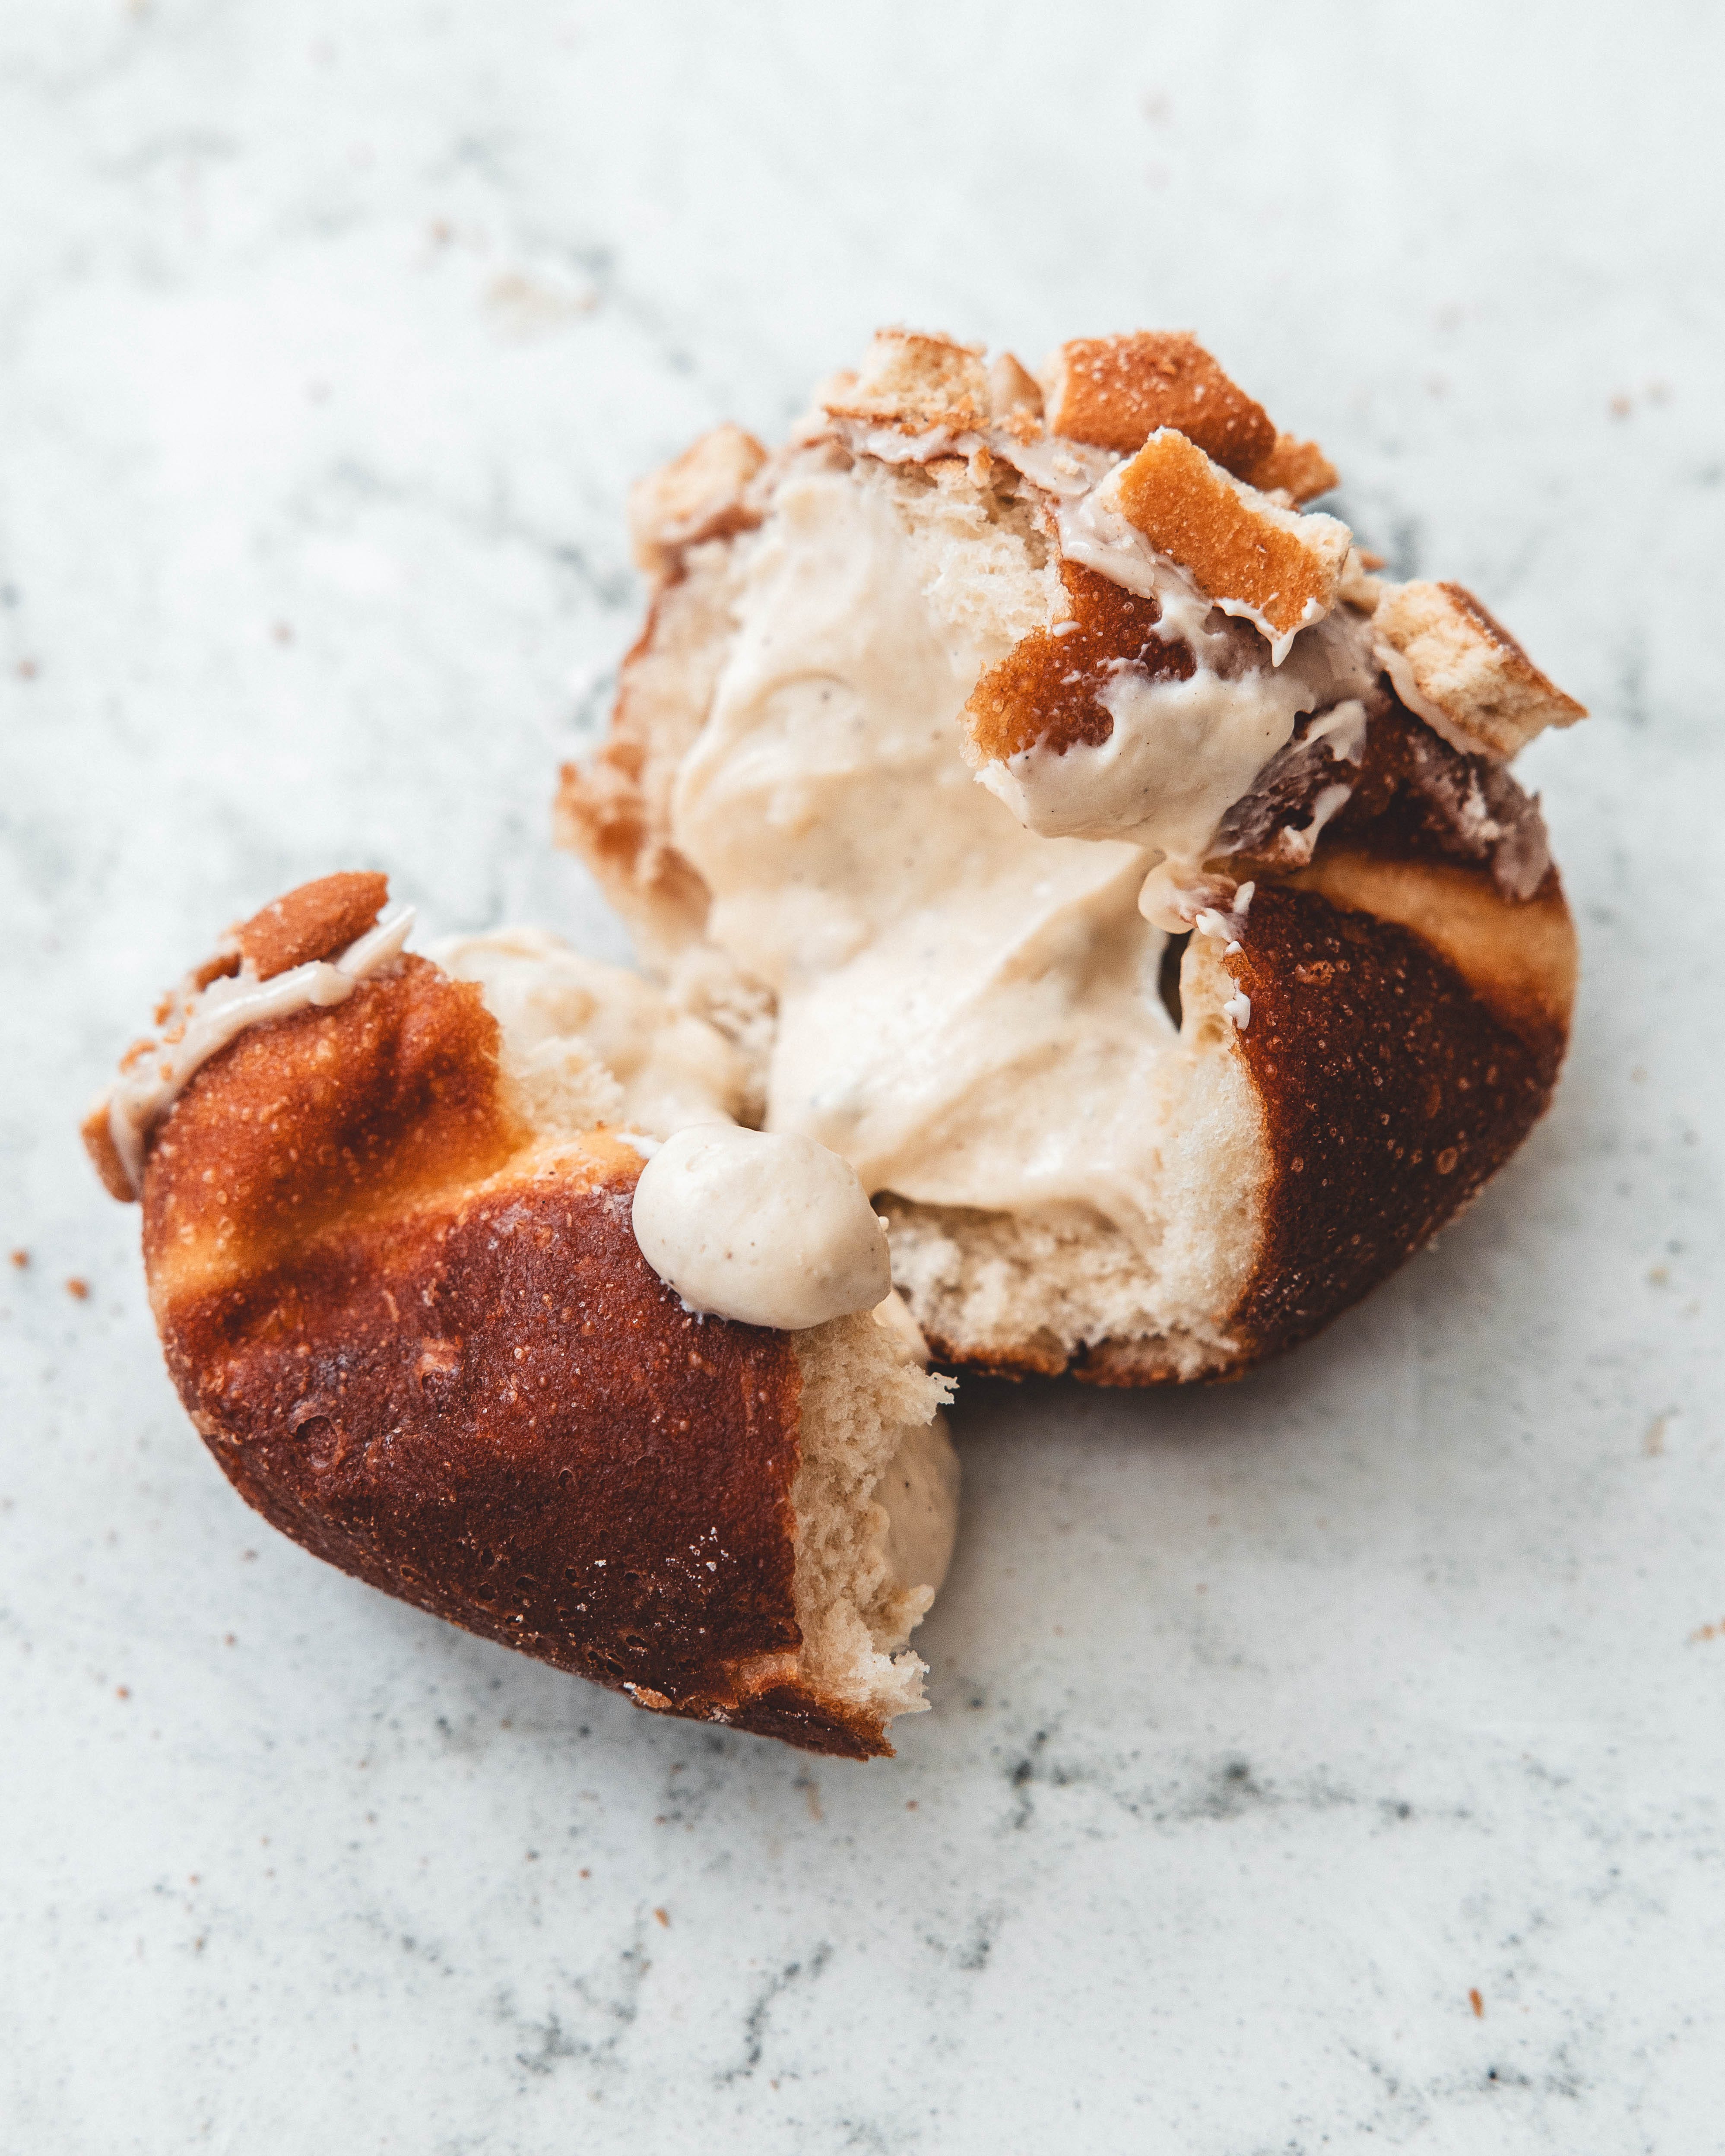
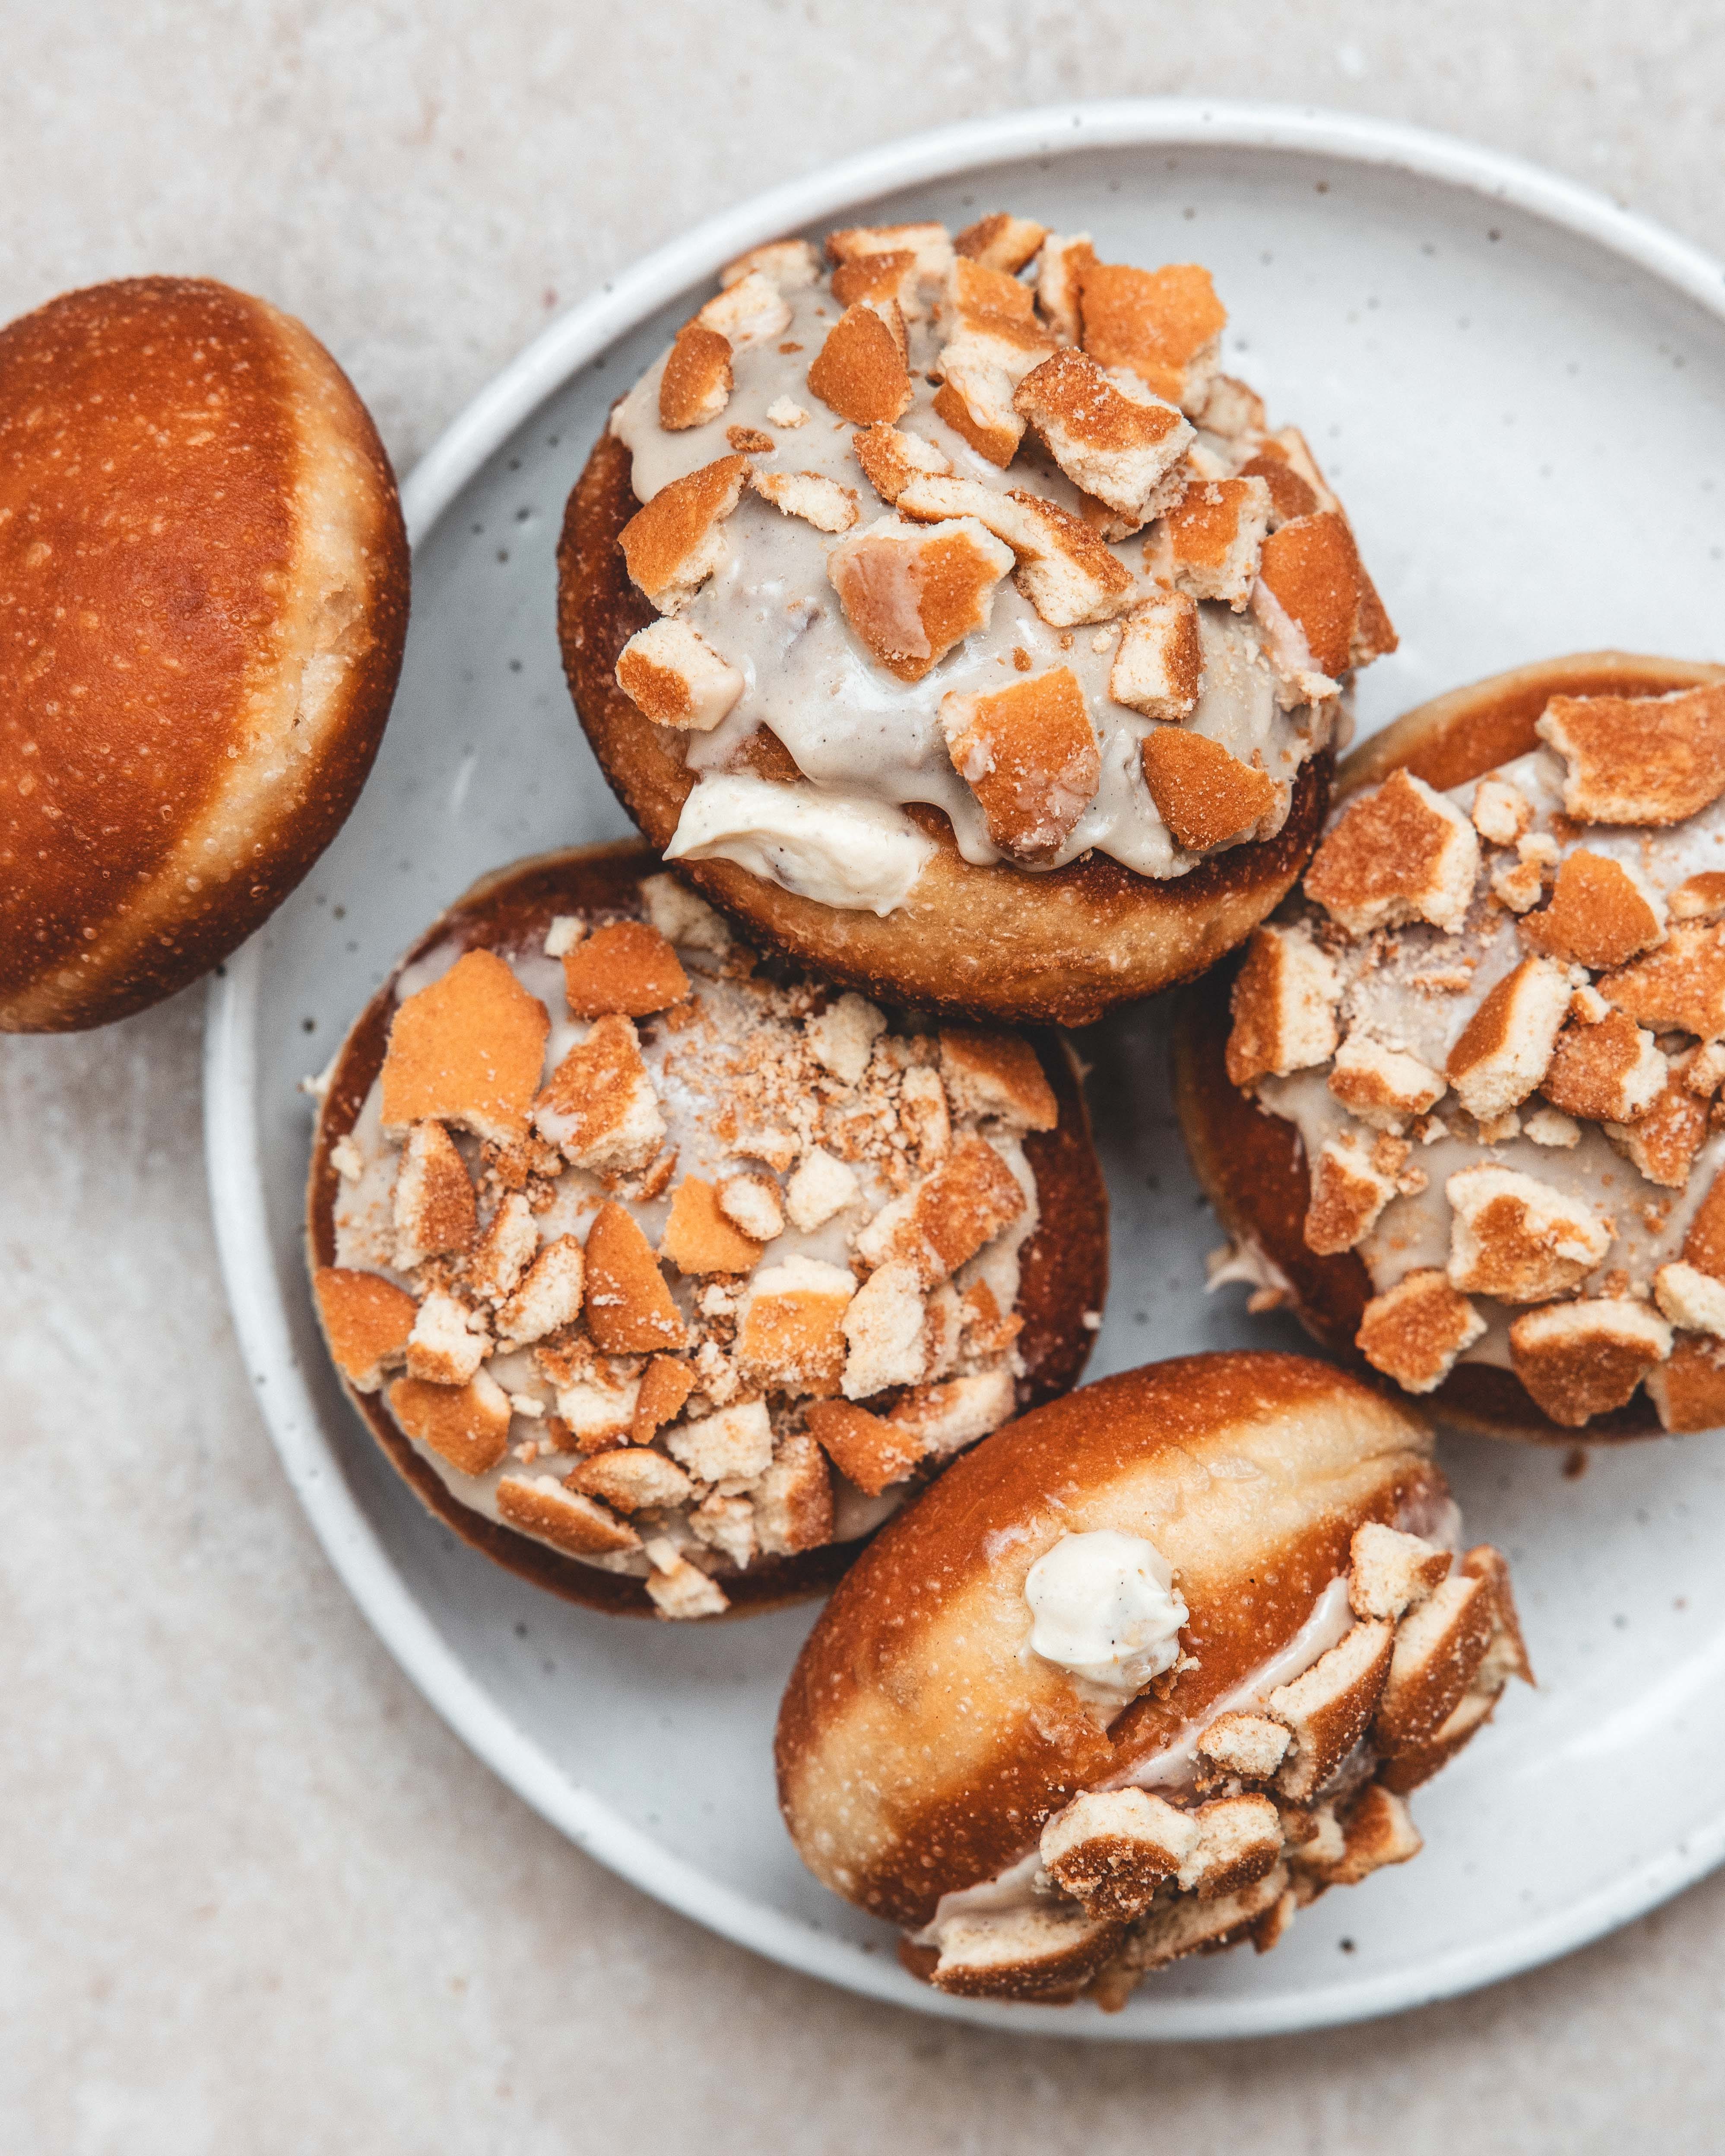
Banana Pudding Doughnuts

Hello, Happy Friday!
🎉 Welcome to my newsletter, The Boy Who Bakes, a subscriber supported newsletter dedicated to all things baked. This below newsletter is one of the weekly exclusive posts that are sent out to paid subsribers. For more weekly posts like this you can upgrade to a paid membership and receive the weekly Second Helpings. It costs just £5 a month and as well as the weekly recipes that also unlocks access to the full archive of past recipes. To subscribe, to either the paid or free newsletter, click the link below.🎉
If you’ve read this weeks free newsletter you will know this week is dedicated to my all encompassing love for banana pudding, and this paid newsletter goes even further turning that classic dessert into the most over the top absolutely fabulous doughnut!
One thing I didn't cover in the free newsletter was the confusion around the word ‘pudding’ because, depending on which side of the Atlantic you live on, the word has very different meanings. In the US pudding refers to a starch based custard, a very simple creamy dessert that comes in many flavours. In the UK pudding is a more all encompassing word for dessert, it can also be used to refer to more old fashioned desserts, more traditional desserts like sticky toffee pudding. Confusingly it can also be used for savoury dishes, like Yorkshire puddings (a close relative of American Popovers) or black pudding, a blood sausage. It’s confusing. Today we are keeping things simple and pudding will only refer to the simple starch based custard dessert.
To make these fabulous doughnuts you will need either a batch of homemade Nilla wafers or a box of the shop bought variety, the choice is yours.
For the doughnuts themselves I made a very conscious choice to avoid brioche. Not because I have brioche, not at all, but because I wanted something that tasted a little more classic, a little more like the doughnuts I often find in the states. These doughnuts are not quite as rich and have a bit more chew than brioche. They’re still incredibly light they’re just not packed full of butter. To clarify this difference, I make a version of this dough that uses 250g of butter, today it uses only 75g. You can make this as either a one day dough or you can break up the process and make the dough the day before you want to fry the doughnuts, refrigerating it overnight so it is ready to shape in the morning. When doing this make sure your bowl is lightly greased with the barest amount of oil so that the dough releases from the bowl without sticking too much, the oil also helps prevent the dough from forming a crust.
When it comes to frying the doughnuts I do things a little against the general consensus. I hate wasting oil for frying things so, even though it takes longer, I use a small saucepan and a much smaller amount of oil. You can of course ignore my approach and fill a large wide pot with lots and lots of oil and use that instead, each to his own. I do realise this means frying doughnuts for about 40 minutes, so, if you want to use a slightly bigger pan that would even fit two at a time that makes sense to me. When frying the doughnuts you want the temperature of the oil to be around 165º-175ºC so using a thermometer, so you can keep an eye on the temperature and adjust the heat as needed, is really important. If the temperature creeps too high the doughnuts will be browned and looked cooked before the inside has finished cooking, leaving you with raw batter in the centre of the doughnut. If the temperature drops too low the doughnuts take forever to fry and end up absorbing more of the oil making for a greasy result.
Keep reading with a 7-day free trial
Subscribe to The Boy Who Bakes to keep reading this post and get 7 days of free access to the full post archives.