Let’s talk about puff pastry. I know, I know, making puff pastry from scratch, and by hand, can seem incredibly daunting but, the results are truly worth the effort, I promise. Plus, you never know, you might find out you’re weird like me, and actually find the process relaxing, therapeutic almost. There is no argument from me that supermarket puff pastry is an incredibly useful product but, once you’ve made and tried handmade puff pastry, you’ll find the flavour and texture is unmatched, the effort pays off ten fold.
Over on Second Helpings (for paid subscribers) today I also have an amazing recipe that uses this puff pastry, a savoury galette that is generously filled with a creamy leek and white bean filling, topped generously with a layer of cheese. As Epiphany, the traditional day to make and serve Galette de Rois (A frangipane filled galette) was last week this is a great savoury alternative to eat all winter long.
So, when it comes to puff pastry, where do we start? There are two elements we need to consider, the dough (called the detempre) and the butter (called the buerrage). Both elements, in themselves, are relatively straightforward, the butter is well, butter. A flat rectangle of butter that is encased in dough (unless you’re making inverse puff pastry where the butter actually encases the dough) and rolled out and then laminated. Sometimes the butter is mixed with flour but I like to keep things simple so nothing but butter. The dough, at its simplest, is a mixture of flour, water, salt and butter. Many recipes, mine included, also include a little lemon juice or vinegar and a touch of sugar. The acid helps to tenderise the dough and also helps make the dough a touch easier to roll out. The sugar helps with browning and is also a tenderiser.
Before we get into all the details let me say this. Forget about perfection. Homemade puff pastry, even if made with a few errors, is almost always going to taste better than anything shop bought. So stop beating yourself up that this needs the hand of pastry perfection. Feel good about yourself for giving it a go and realise that every time you make it, you’ll learn something more and make a better final product. You can do this, I believe in you!
The Detempre - The Dough
When making the dough we need to consider the whole process. Puff pastry does need some gluten development but, because of the amount of rolling out that will happen during lamination, it is very easy to overwork a dough which makes it incredibly hard to use and can cause a lot of shrinkage. To counteract this, the initial mix of the dough is minimal so that you start with a dough which has as little gluten development as possible. If you knead the detempre too much, when it comes time to lamination you’re going to have a very elastic dough that will be incredibly hard to roll out. To make the rolling out easier the dough includes a little butter. When flour is coated in fat it acts as a barrier between the flour and the water, the two ingredients which when combined develops the gluten. Removing the butter from the recipe would make the process a lot harder, as gluten development would happen a lot more readily. When it comes to choosing the type of flour to use some recipes use plain flour and some use bread flour. I like to use a combination of the two to make a dough with strength but not so much that it becomes tough and hard to roll out.
Beurrage - The Butter
As far as I’m concerned the most important thing about puff pastry and making it successfully is setting yourself up for success with the butter block. To get those perfect layers we are all striving for the butter needs to be pliable. If the butter block is cold it will shatter as it’s rolled out meaning instead of beautiful continuous sheets of butter you’ll have irregular shards of butter. Inversely if the butter is too warm and too soft it will blend into the dough far too much and is more likely to break free of the dough as you laminate. The key is starting with a butter block that is pliable and bendy but not soft or warm. If you can bend the butter without it cracking and also press with your finger, leaving an indent but it not feel soft or greasy, your butter is perfect. Traditionally the dough would be made with tourage butter, a specially formatted butter that is slightly higher in fat than supermarket butter and which is designed with flexibility in mind. Whilst it is now slightly easier to find in the UK, with Estate Dairy making an excellent version that they sell direct to the public (normally tricky to buy just one or two sheets from bigger producers) using supermarket butter is absolutely fine, just make sure it is at least 82% fat (the standard in Europe).
Top Tips
Don’t over knead the dough when it’s first made
Make sure the butter is nice and pliable before you start lamination
If the dough starts to resist don’t fight it, pop the dough in the fridge and leave it rest
If the dough starts to feel too soft, put it back in the fridge for 10-15 minutes
Brush off excess flour before folding the dough
Lamination
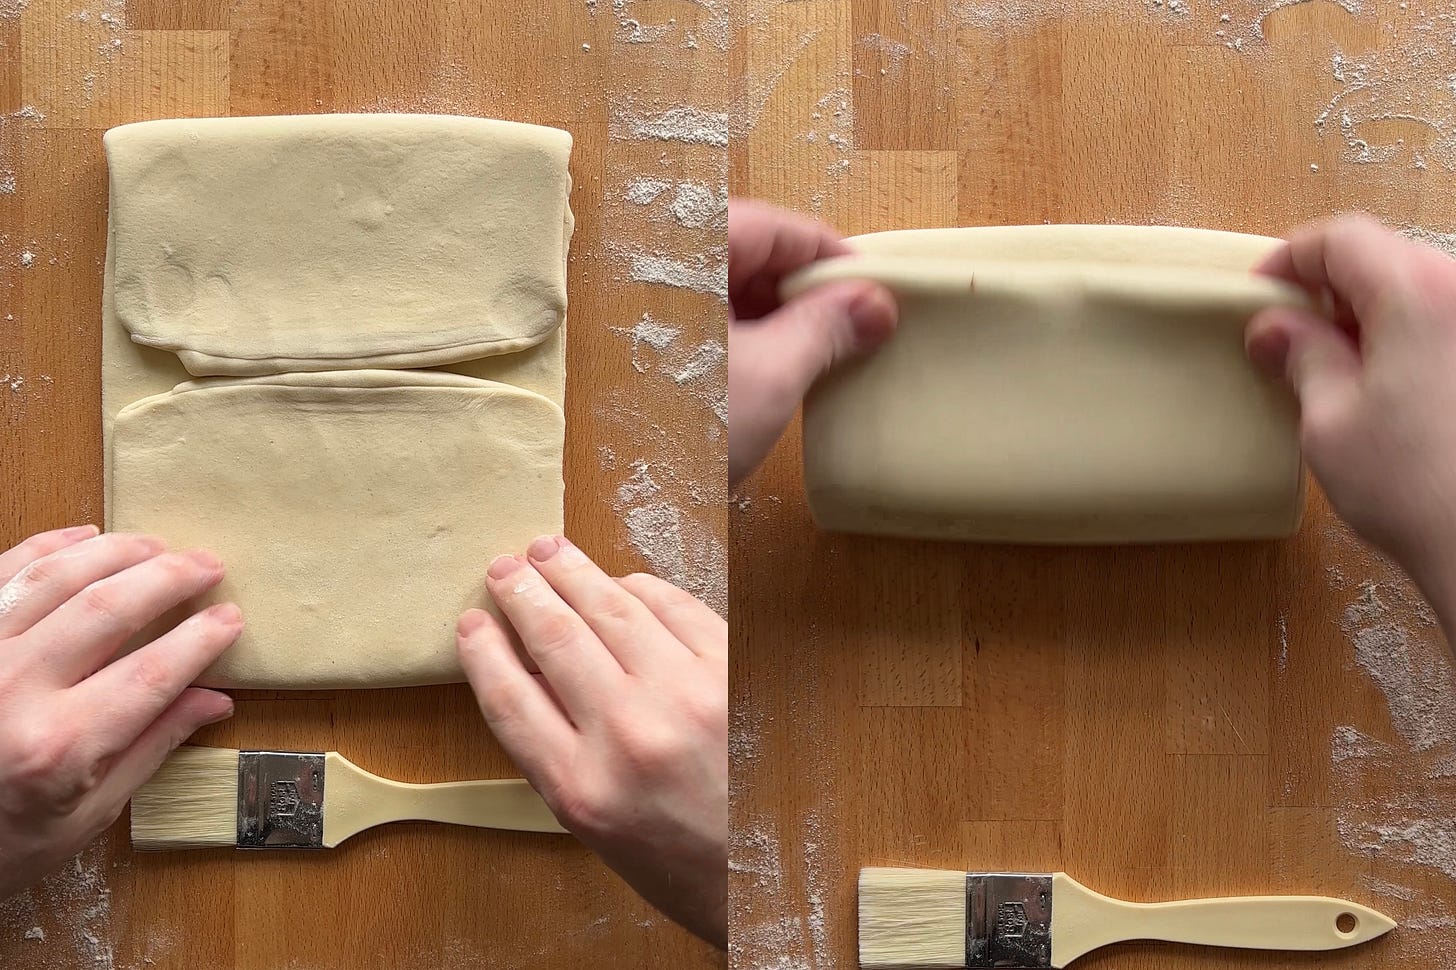
Before we get to the recipe let’s talk about styles of lamination. Traditionally puff pastry is made with 6 single or ‘letter’ folds like shown below. This makes a dough with 1459 layers (hence the name of the dish millefueille - a thousand leaves). These layers are very thin and very easy to shatter when rolling out the dough if too much pressure or too much warmth is applied. I prefer using a mix of single and double, or ‘book’, folds. I do one double fold and four single folds, which creates a dough with 649 layers. I have seen recipes that use all manner of folds, some use four double folds, some 2 single and 2 double, some just cut out one of the singles and use 5, it basically comes down to personal preference. With less layers you’re more likely to see defined separation and defined layers. This is especially true when you’re making puff for the first few times when it’s easy to crush and compact the layers on later folds, it’s also one less roll out so a little less work too.
Puff Pastry (makes enough for a 10 inch galette)
125g plain flour
125g strong white bread flour
5g caster sugar
5g fine sea salt
50g unsalted butter, diced and at room temperature
110ml ice cold water
10ml lemon juice or apple cider vinegar
250g unsalted butter, chilled
In the bowl of a stand mixer mix together the flours, sugar and salt. Add the butter, and using the flat beater, mix for a minute or so until the butter disappears into the flour and the mixture resembles fine breadcrumbs. In a jug whisk together the water and lemon juice and slowly pour into the flour mixture, whilst the mixer is running, mixing just until a shaggy dough is formed. Turn the dough out onto the worksurface and work briefly just until uniform. Pat the dough into an 7-inch square and wrap in clingfilm and refrigerate. You can use the dough after an hours rest but generally I find it beneficial to rest the dough overnight, it will be slightly easier to use this way.
For the butter draw a 6-inch square on a large sheet of parchment paper and turn it over so the drawing wont touch the butter. Cut your butter into slices and layer atop the parchment, using your drawing as a template. Try and layer the butter in an even thickness, but don’t worry too much as the next stage will even everything out. Fold over the parchment to encase the butter and turn it over so the folds are facing down. Using a rolling pin, and your stress from the week, bash the butter until it is soft and pliable. Once the butter is starting to soften using a rolling action to even out the butter so it is roughly the same thickness. At this stage the butter will have likely spread beyond the lines of your drawing so unwrap the butter and use a knife to trim it back into a neat 6-inch square. Place the butter trimmings back atop the square of butter and wrap back up as a neat square packet. Use a rolling motion to gently work the butter cuttings back into the butter block without extending the size beyond your neat 6-inch square. Refrigerate the butter until you are ready to start.
Note: if making the pastry the same day you can generally use the butter immediately after you have done the last step. After bashing and rolling the butter it is generally in the perfect form, pliable but still cool. The first time you make the butter packet, this may not be the case however, as it’s not unusual to bash and roll the butter a little more than needed warming it up and softening it beyond the ideal situation. This is another reason I find it useful to prepare both the dough and the butter the day before, so you can ensure everything is in the perfect condition.
The following day, when ready to laminate, you need to remove the butter and allow it warm up just enough for it to become pliable. The butter packet should be able to bend without cracking and you should be able to press it with your finger leaving an impression in the butter but not leaving a greasy or melted texture on your finger.
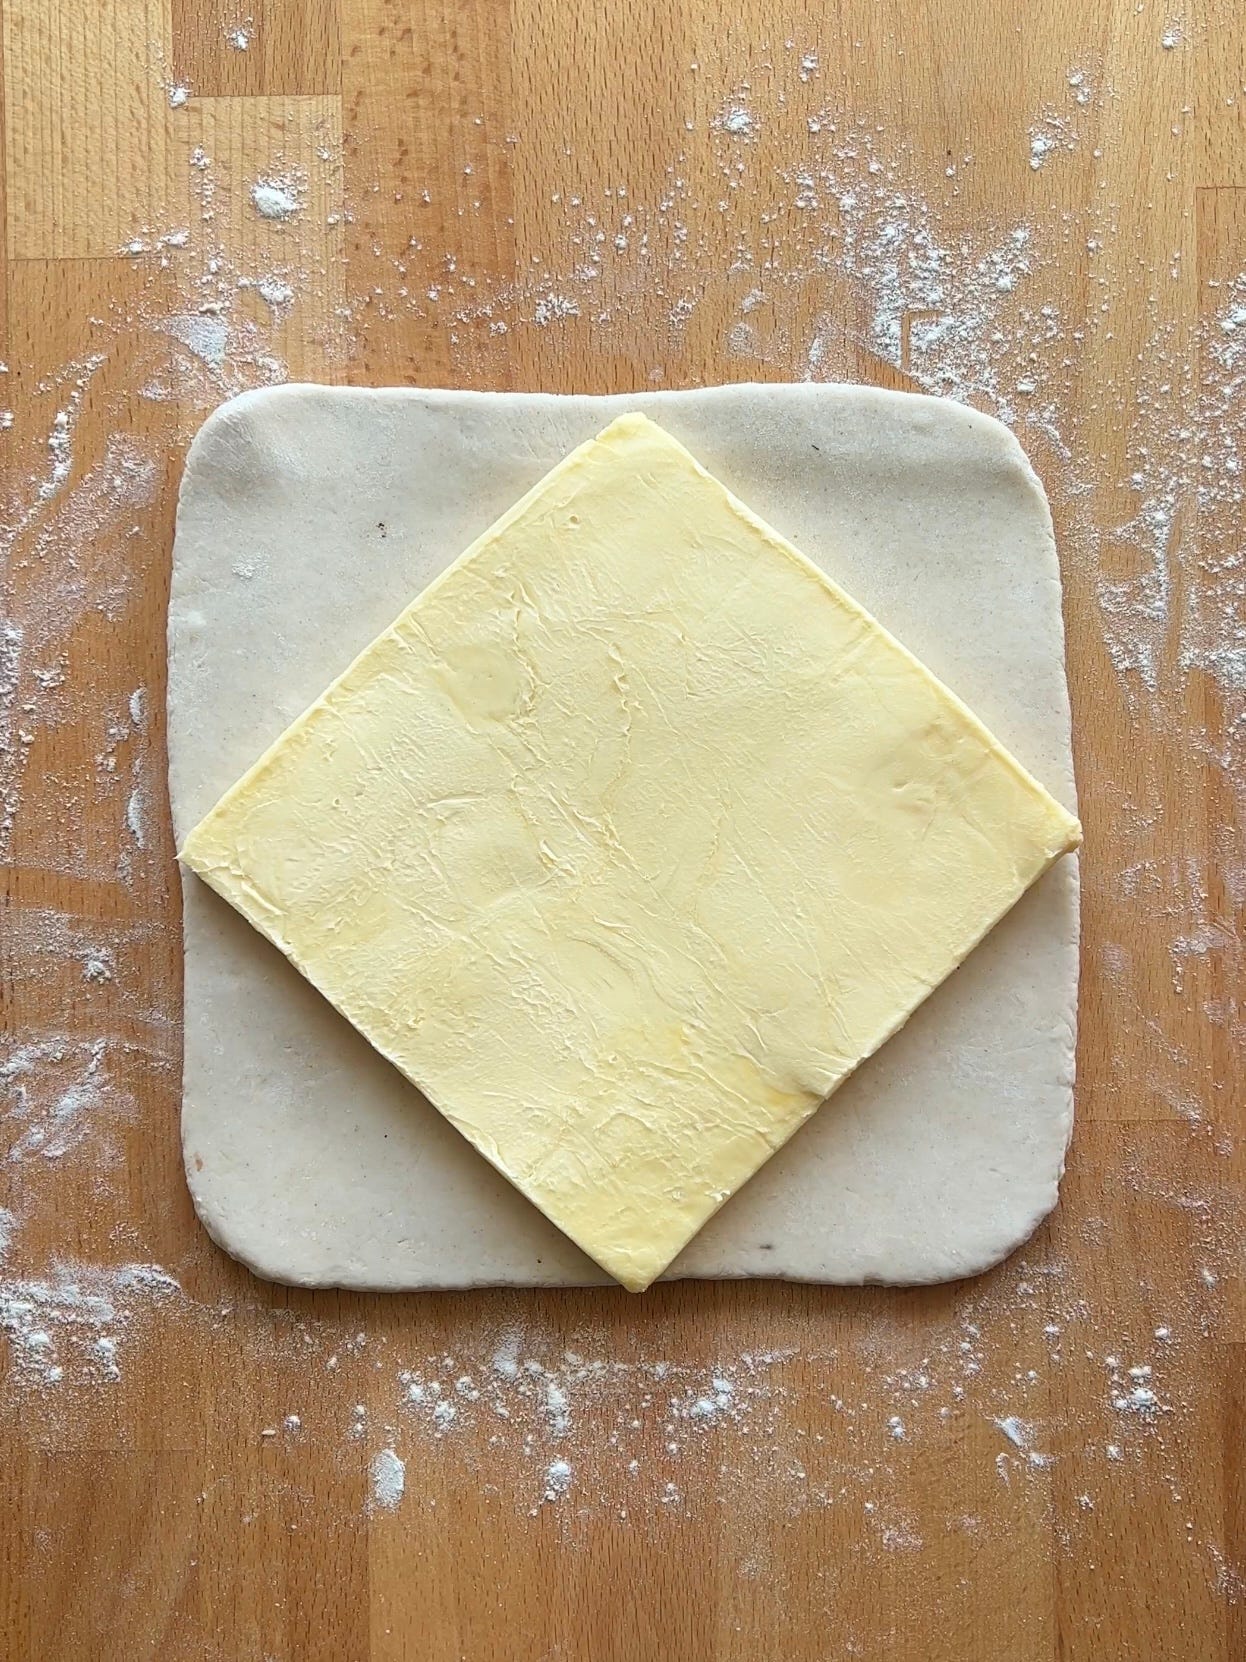
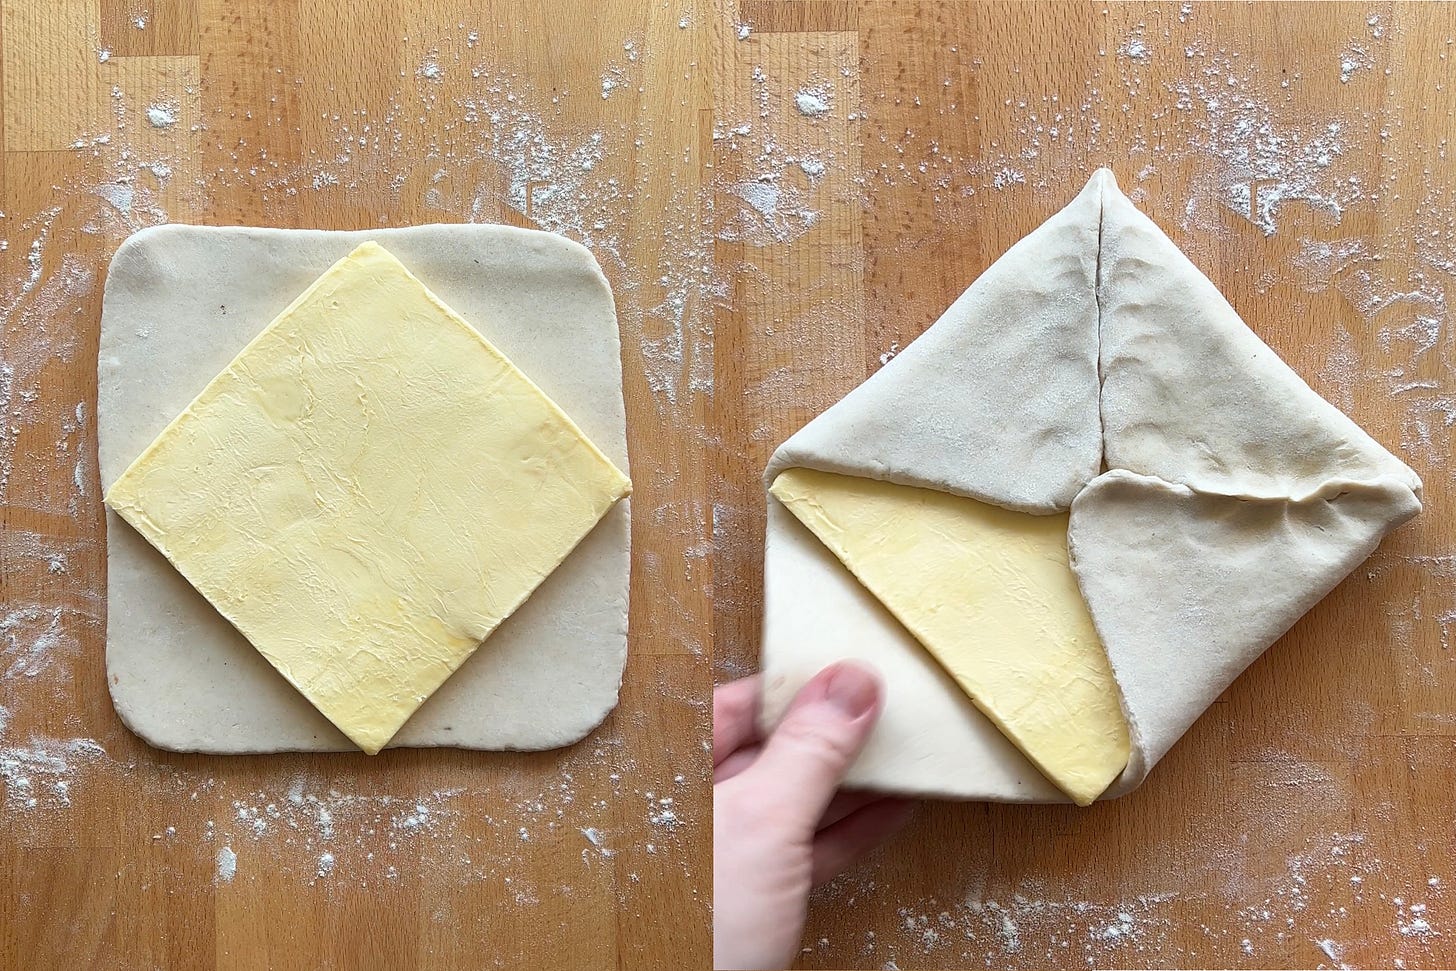
Once the butter is at the right texture remove the dough from the fridge and on a lightly floured worksurface roll out into an 8 1/2 square, this light rolling helps to a) ensure the dough is the right size and b) softens it a touch to make it the same texture as the butter, cool but pliable. Lay the butter atop the dough with the corners of the butter hitting the middle of each side of the dough (like a diamond sat atop a square). Fold the corners of the dough over the butter, pinching the dough together so it fully encases the butter.
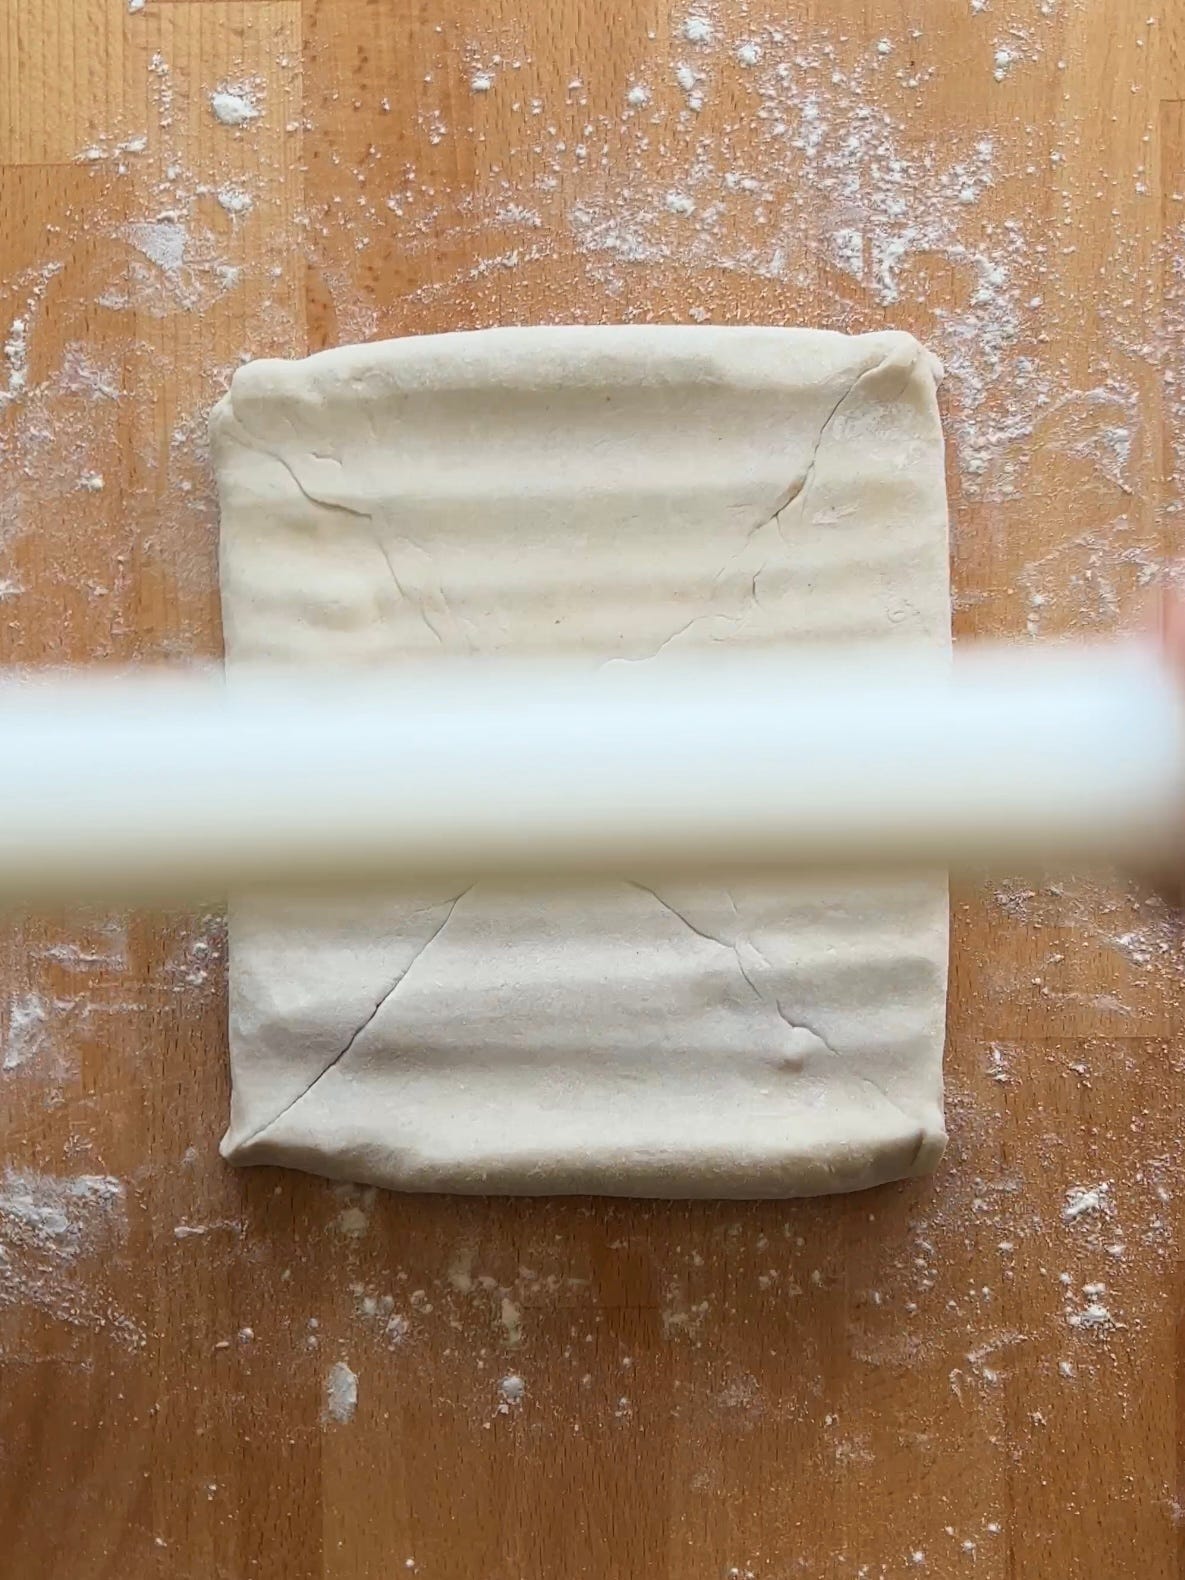
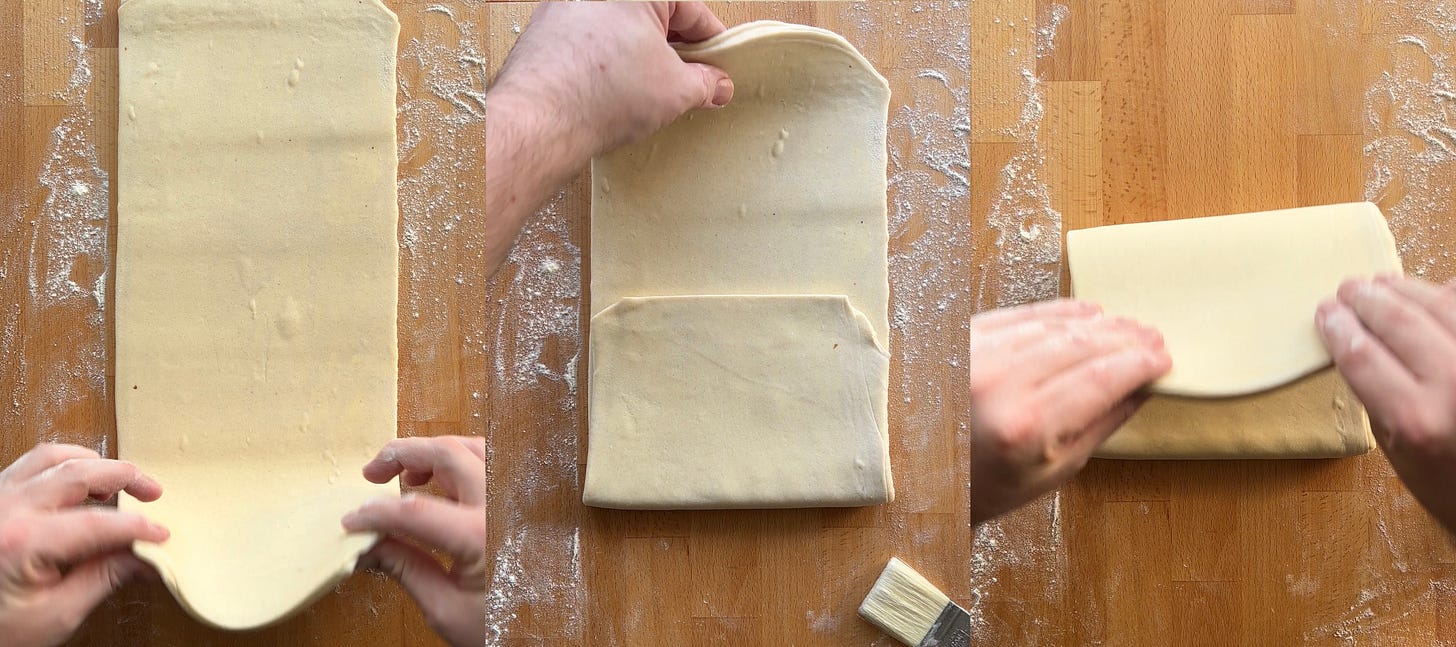
To start the lamination lightly press the dough along its length to extend it a little without rolling. Doing this helps to ensure your dough stays neat and your butter doesn’t become uneven as its rolled. Roll the dough into a long rectangle that is about 45-50cm long. Brush off any excess flour and fold in thirds like a letter. Turn the dough 90º so the open ends of the dough-letter are facing towards and away from you. Repeat the rolling process a second time, folding in thirds as before. Wrap the dough in clingfilm, or use a ziplock bag, and refrigerate for 30-40 minutes before repeating the roll out and folds two more times; this means you will have folded the dough a total of four times. Rest the dough once again before doing the final fold.
Whilst I generally find I can do two folds before the dough needs relaxing in the fridge, if you find the dough fighting you and becoming hard to roll out it is always better to refrigerate the dough for a while before continuing. If you have the time and are worried about over working the dough you can do a 30 minute rest between each single fold.
After the final rest, roll out the dough as before but this time we will perform what is called a book/double fold. To do this, fold the ends of the dough over to meet in the middle and then fold the dough in half again, like closing a book. Wrap the dough in clingfilm and refrigerate before using. I like to rest the dough for at least 4 hours before using to allow the gluten to relax.
When it comes to using/storing the puff pastry I generally like to cut the dough into two pieces and then either freezing as a block or more helpfully rolling out into a rectangle and rolling up in parchment paper and then wrapping in clingfilm and freezing for later use.


Thank you for sharing those tips, I finally feel ready to try!
So useful, thanks. Especially the words of encouragements! Any tips on rolling the dough into a square/rectangle? I always struggle with that!