


Brown Butter Cardamom Crumb Cake
with Pear and Burnt Honey Cream


Happy Friday!
If you haven’t seen my very exciting news, make sure you check out that post first (spoiler alert, I have written a new cookbook!) before coming back here for a fabulous weekend recipe.
But back to the here and now, I have for you today, maybe the ultimate in cosy baking.
Like a true brit all I have done this week is talk about how miserable the weather has been, watching the rain and hoping it will soon stop, mainly so I can take Wesley for a walk, he’s a sensitive dog who refuses to walk in the rain. Come to think of it, he’s just like me I guess. Seriously though, you’d be shocked how a dog so little can dig his heels in so hard, it’s like he is glued to the spot! Because of the rain and the gloom, I wanted something cosy, something warming and something I could nibble on every time I passed it in the kitchen. I needed a snacking cake. I love this style of recipe, they’re simple in terms of effort but also simple in terms of complexity. A snacking cake is not some triple layer cake affair with two types of filling and an extravagant decoration, a snacking cake is humble, more like a single cake layer with a poured icing, or a loaf cake with a lemon drizzle. It’s a cake you have for elevenses.
The recipe I settled on was a loaf cake, more precisely a pear crumb cake. Because I was going to make a crumb topping for the cake, I wanted the cake element itself to be a one bowl affair, the crumb was to be the element with any real effort and even then, it’s still about as simple as it can get. Simple the whole thing may be but that doesn’t mean it is lacking in the flavour department. Not in the slightest. The cake itself is made with olive oil which gives both an excellent texture and excellent flavour, it also includes just a smidgen of cinnamon. This isn’t an in your face spicy cinnamon, it’s gentler, more restrained. The batter is topped with diced pear (you can also use apple) and finally a ridiculously good brown butter cardamom crumb.
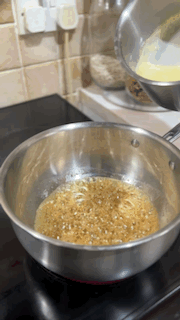
Now, if that didn't sound good enough already, and if it didn't I’m sorry but we can no longer be friends, I have a little something extra, the gilding for the lily, an optional bonus recipe that I would suggest is actually not in anyway optional but a fabulous addition that takes this from a 10 to an OMG that delicious kind of affair. I am talking about burnt honey cream. I have used this technique before when making a layered honey cake, but I’ve never posted a recipe for it and it is about time that changed. I was reminded of the technique after a recent visit to The Pig Hotel outside of Canterbury. On the menu they had a burnt honey cream, a creme brûlée sweetened with burnt honey. The flavour is deep and rich, like a cross between a salted caramel and a floral honey, almost like honeycomb. It worked wonderfully in the brûlée and I wanted to add that flavour to this cake, so I used the technique to make a burnt honey whipped cream. It takes 5 minutes of time to make, and it needs making the day before you want to serve it, but that little bit of advance preparation is well worth it. The resulting cream is unbelievably good.
Keep reading with a 7-day free trial
Subscribe to The Boy Who Bakes to keep reading this post and get 7 days of free access to the full post archives.